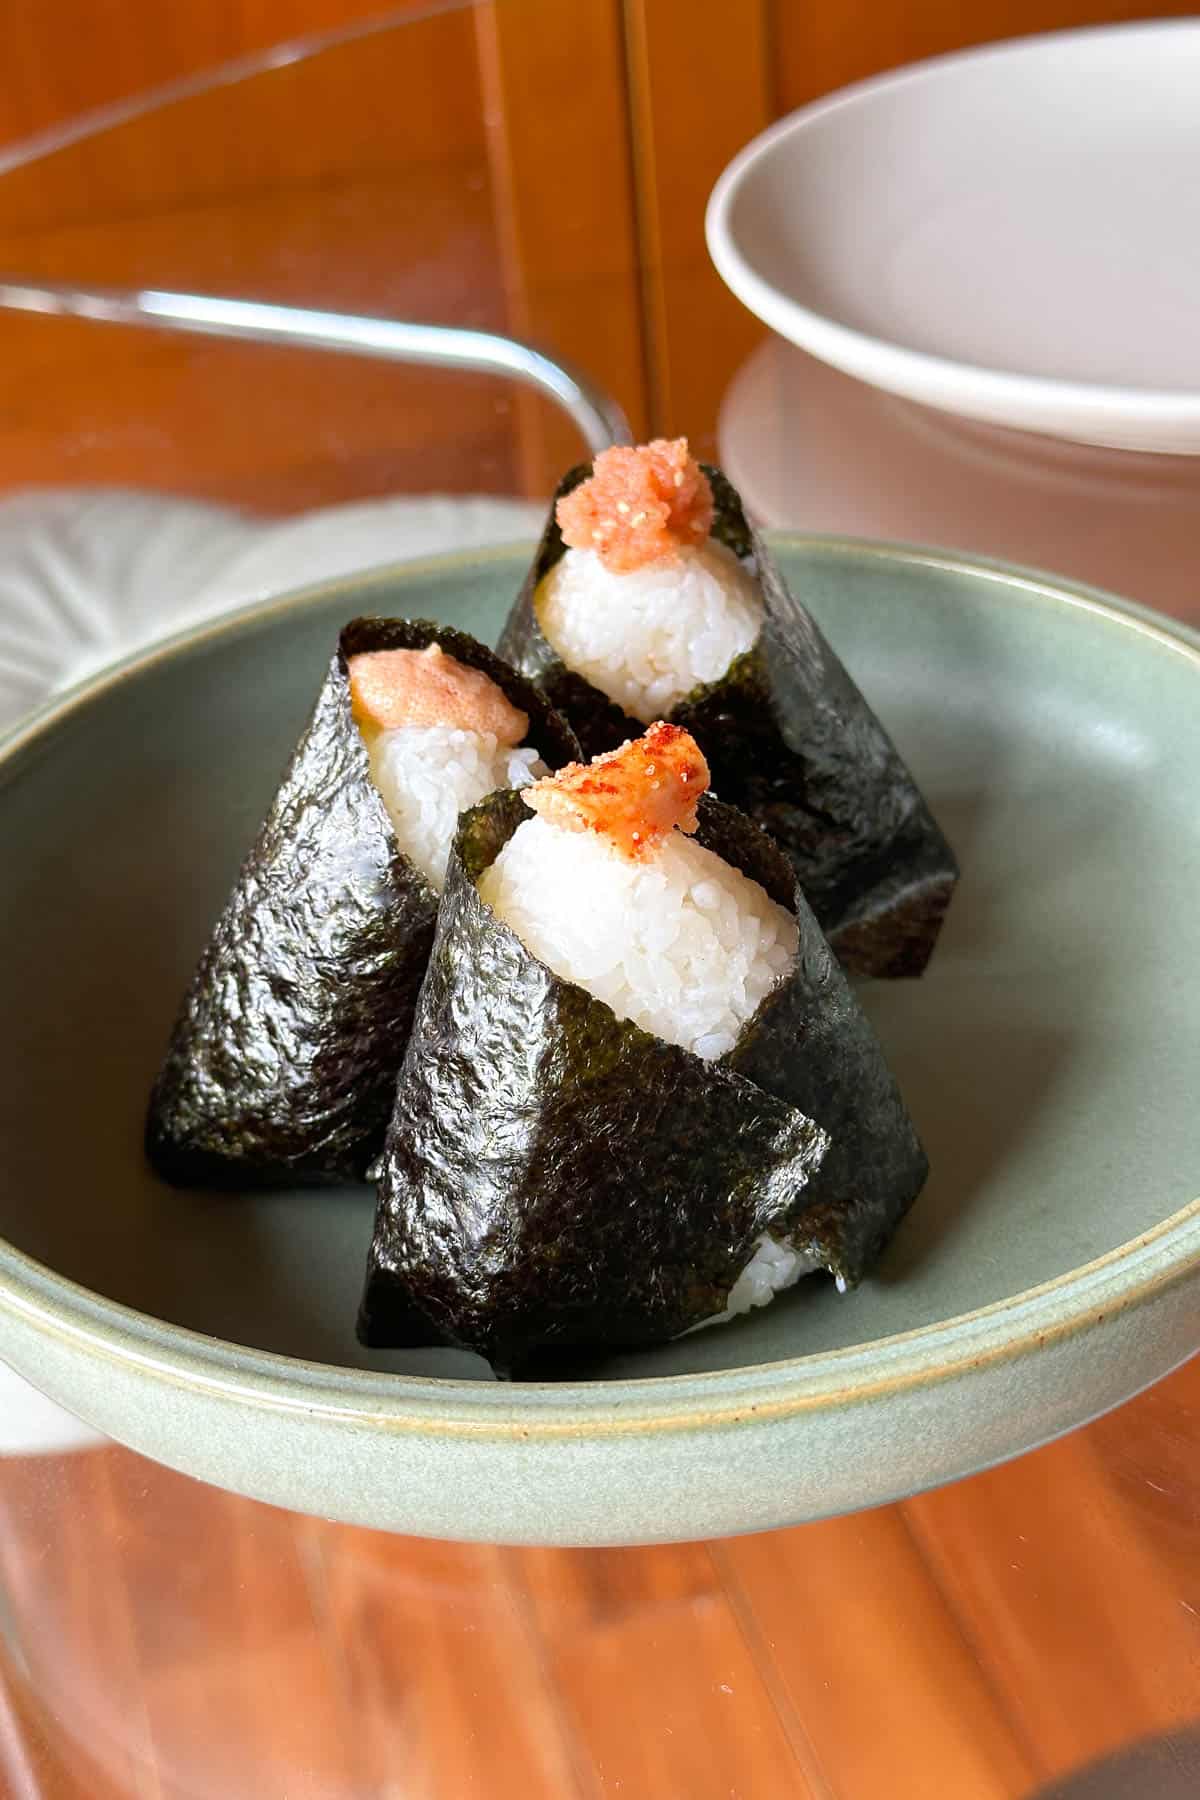
Mentaiko = spicy cod roe. We use mentaiko to make fresh Mentaiko Onigiri (aka Musubi). There are 3 different ways you can make the mentaiko filling. Each person in my family has a different favorite, so we like to make them all! ^_^
I've been eating onigiri / musubi my whole life here in Hawaii. But it wasn't until recently that we got into making them at home (not counting spam musubi ;).
It's delicious, fresh, cost efficient and you can decide what fillings and how much of the filling you want. I love making onigiri and my whole family loves eating it. A win, win, win.
Tuna Mayo is the most popular filling, though I also enjoy Kombu when paired with a flavorful dish. And there are also modern fillings like Bacon Almond. And of course, the Hawaii favorite, Spam Musubi.
For today's mentaiko onigiri / musubi there are 3 different types of mentaiko fillings you can make. They're all quote different as you can see in the photo above! But all super simple. You can make all 3...and do a mentaiko musubi tasting, so fun hahaha. Or just make 1. Up to you ^_^
The Musubi Book

Many of these recipes are inspired by The Musubi Book by Manabu Asaoka. Manabu is the owner of Mana Musubi, a popular musubi shop in Honolulu. He talks about mentaiko in pages 52-53 in the book.
(Buy the book in person at his musubi shop, or order online. It's a great book! Part musubi guide/info and part recipe cookbook.)
Ingredients
Here's what you'll need:
Ingredients
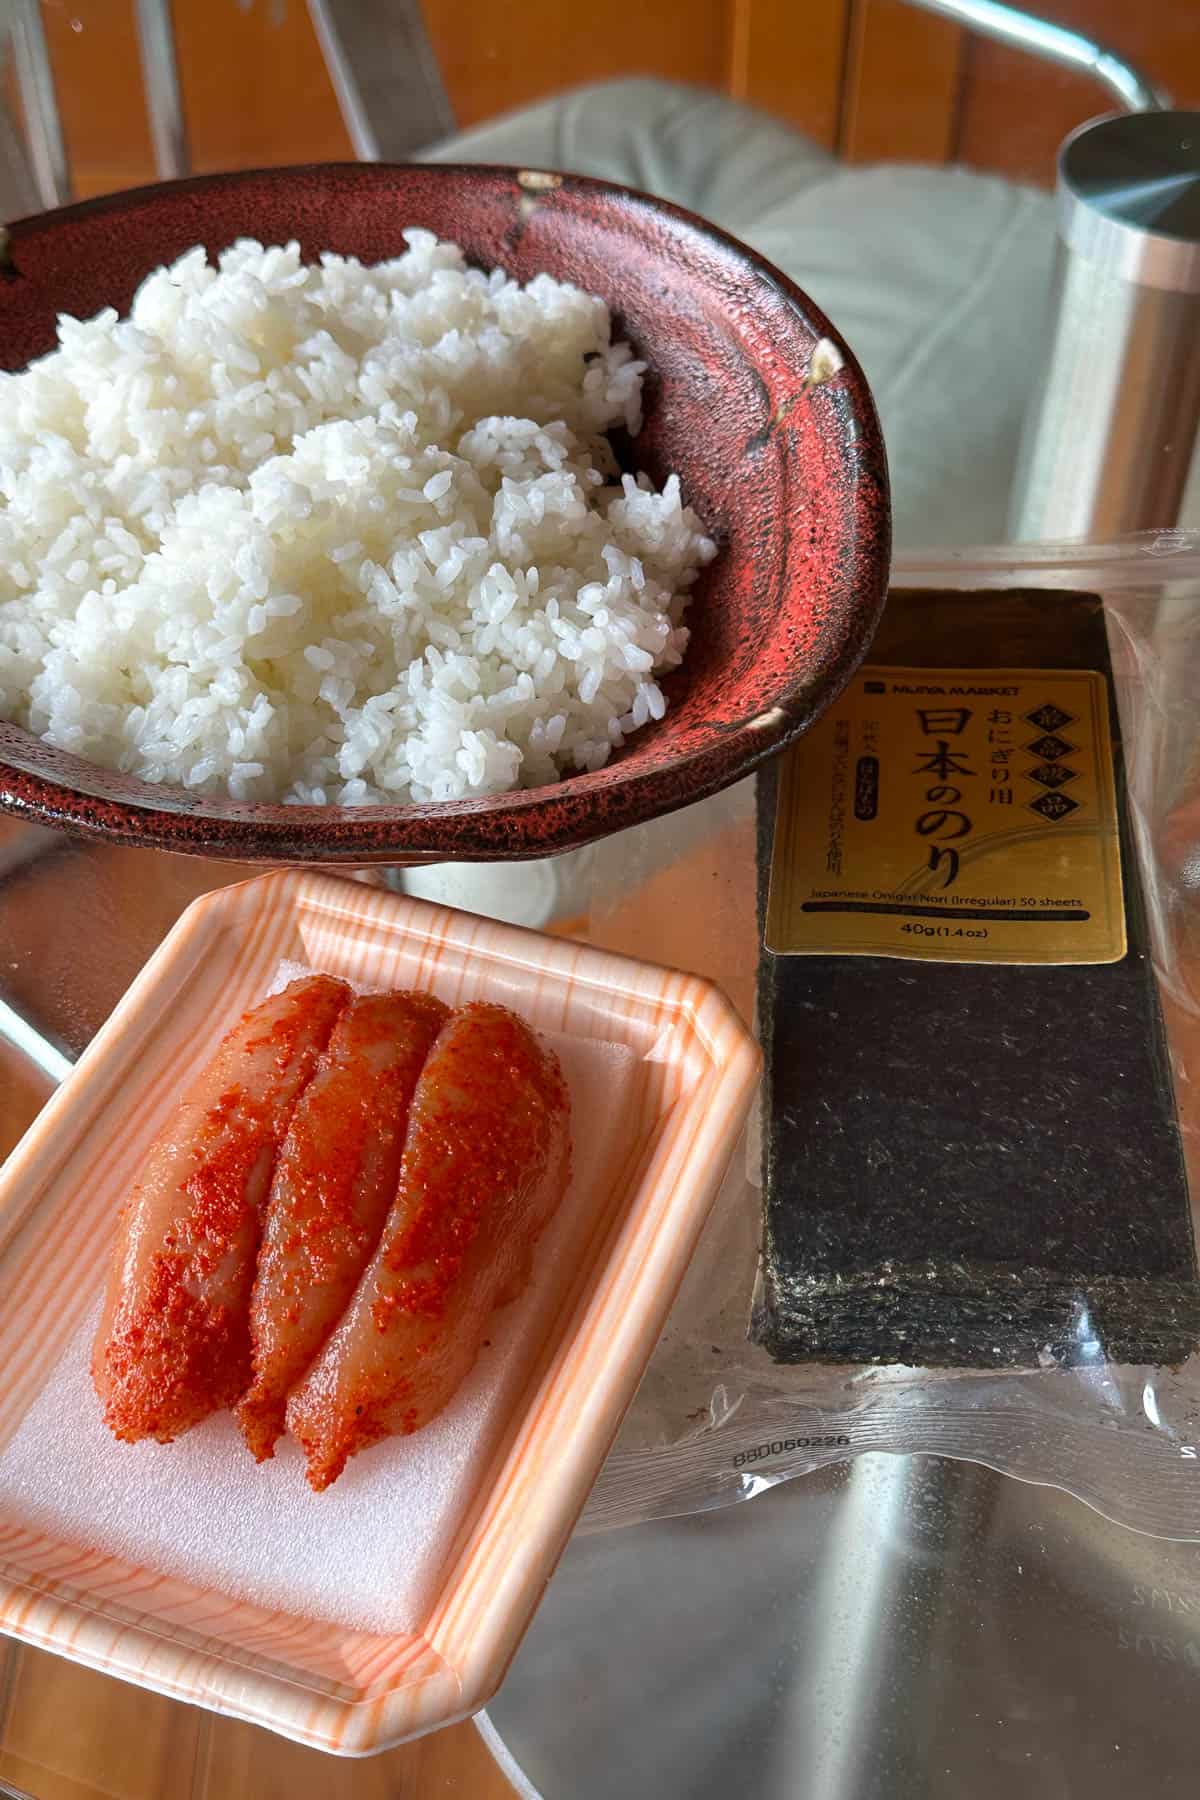
- Fresh cooked Japanese short grain rice, still warm
- Mentaiko (spicy cod roe)
- Nori sheets - You can use full size nori sheets and cut them lengthwise into thirds. Some Japanese markets also sell nori sheets that are already cut and sized for onigiri making.
- Onigiri mold - The one piece of special equipment you'll need for this recipe is an onigiri mold. You can buy them easily online or at most Japanese markets.
Depending on which type of mentaiko filling you want to make, you'll need different ingredients. You can make one type or make all three! If making:
Plain (cooked) mentaiko filling:
- No additional food ingredients are needed, just a small pan to cook the mentaiko lobes.
Mentiko mayo filling:
- Mayonnaise - Kewpie mayonnaise preferred
Sesame oil mentaiko filling:
Instructions
Let's begin!
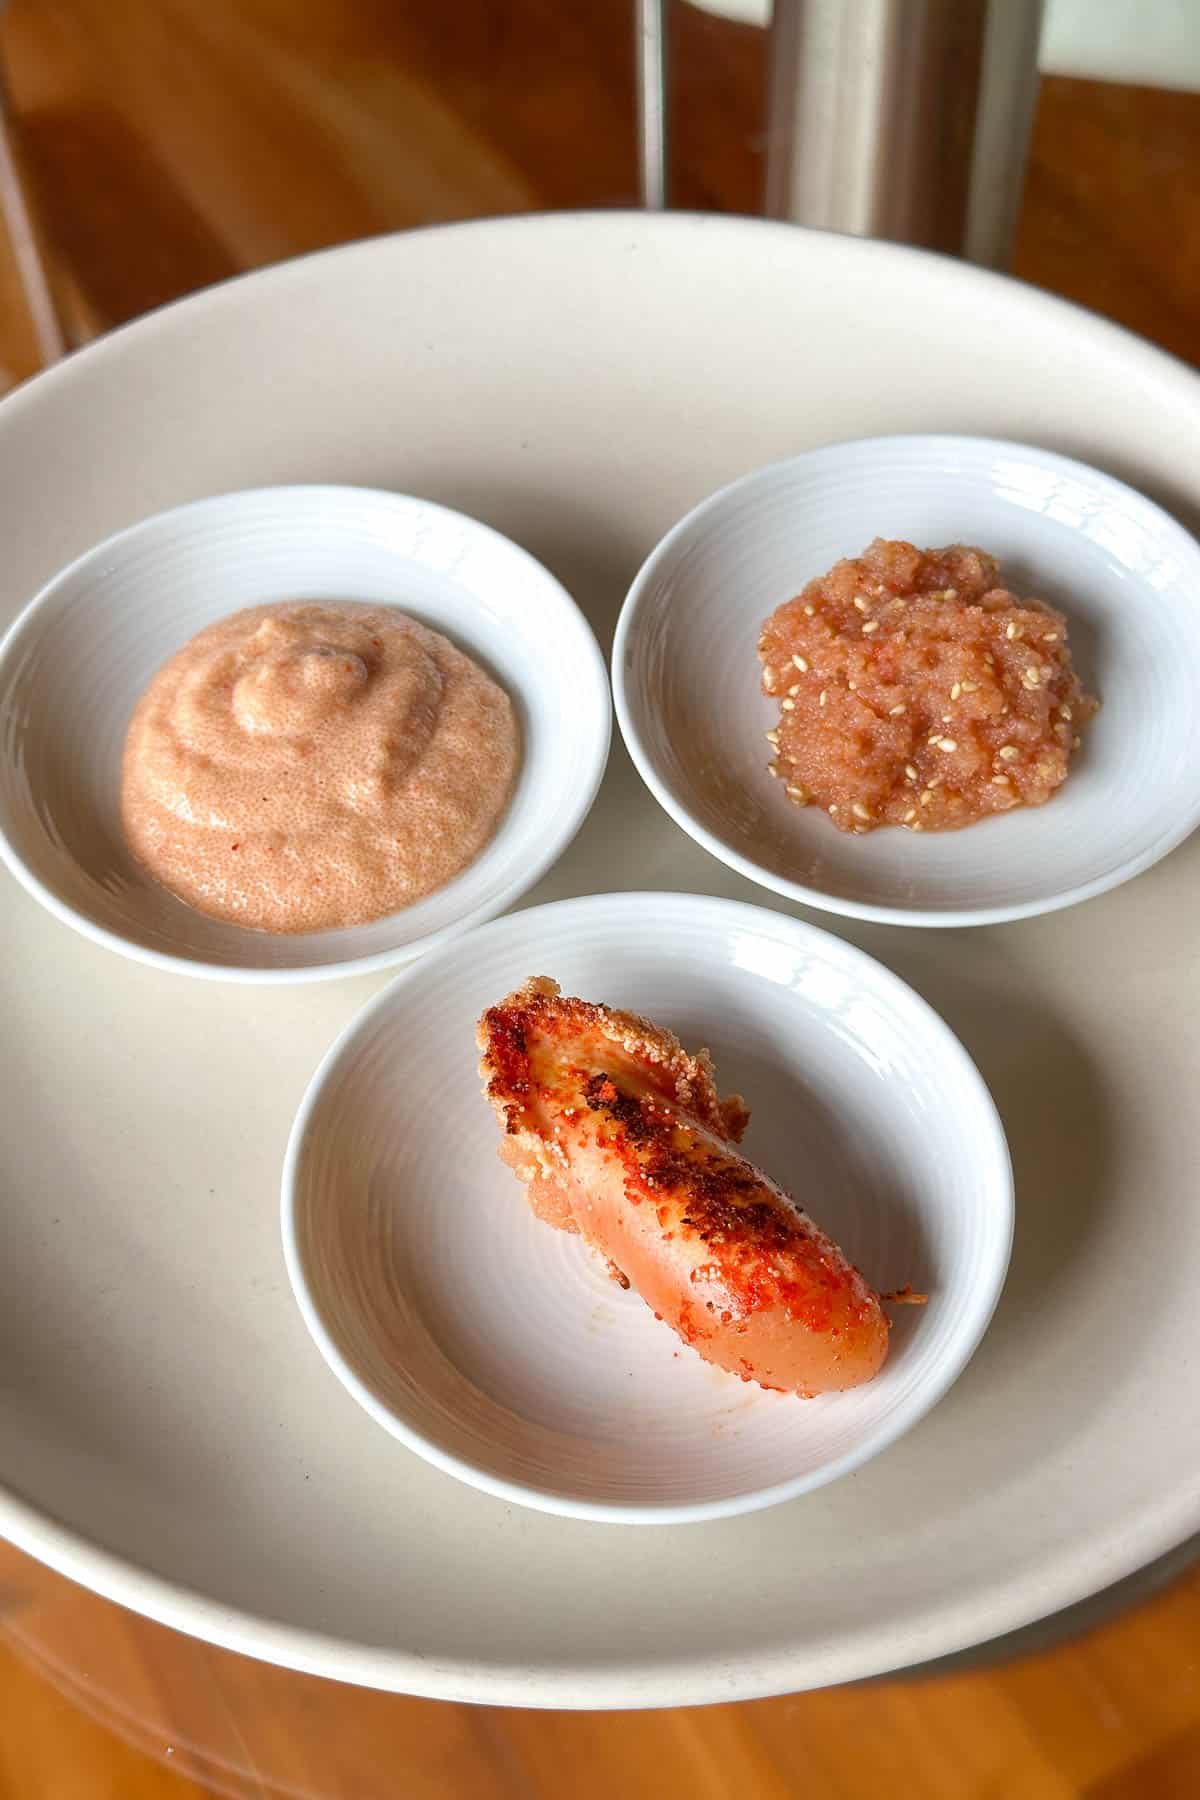
First make the mentaiko filling. There are 3 types of filling I like to make. They are all pretty simple and delicious.
The first one (plain cooked mentaiko) is the most easy and requires no additional ingredients. The mentaiko mayo filling is very popular and the version you'll find at most onigiri/musubi shops. The third version with sesame oil is the one my mom loves, it is so lovely and maybe the most "elegant" tasting of the trio. Here's how to make them all!
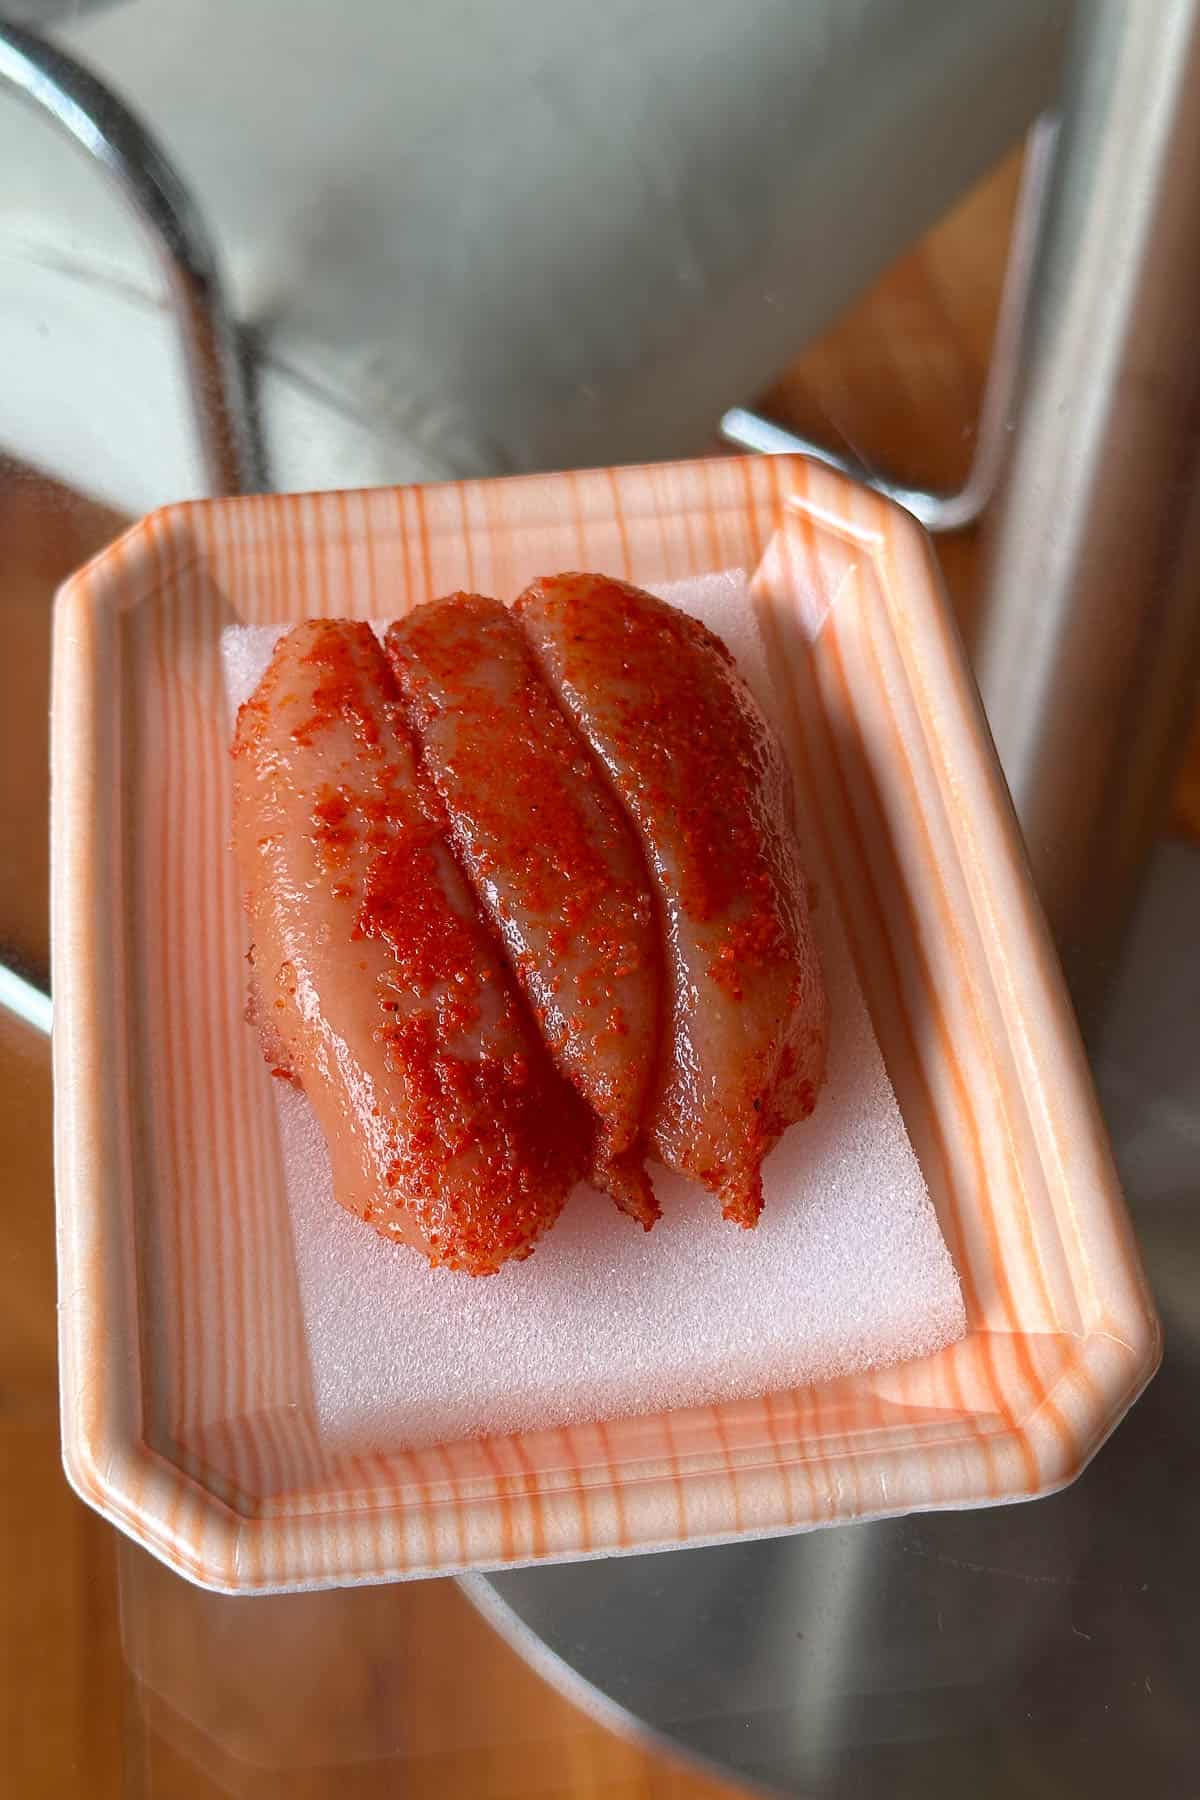
Note: Since this recipe calls for 3 mentaiko lobes (you can see 3 lobes pictured in the package above), you can make all 3 types of fillings and see which one you like best! Or if you already know which one you like, you can prepare all 3 lobes the same way.
If making Plain (Cooked) Mentaiko Filling:
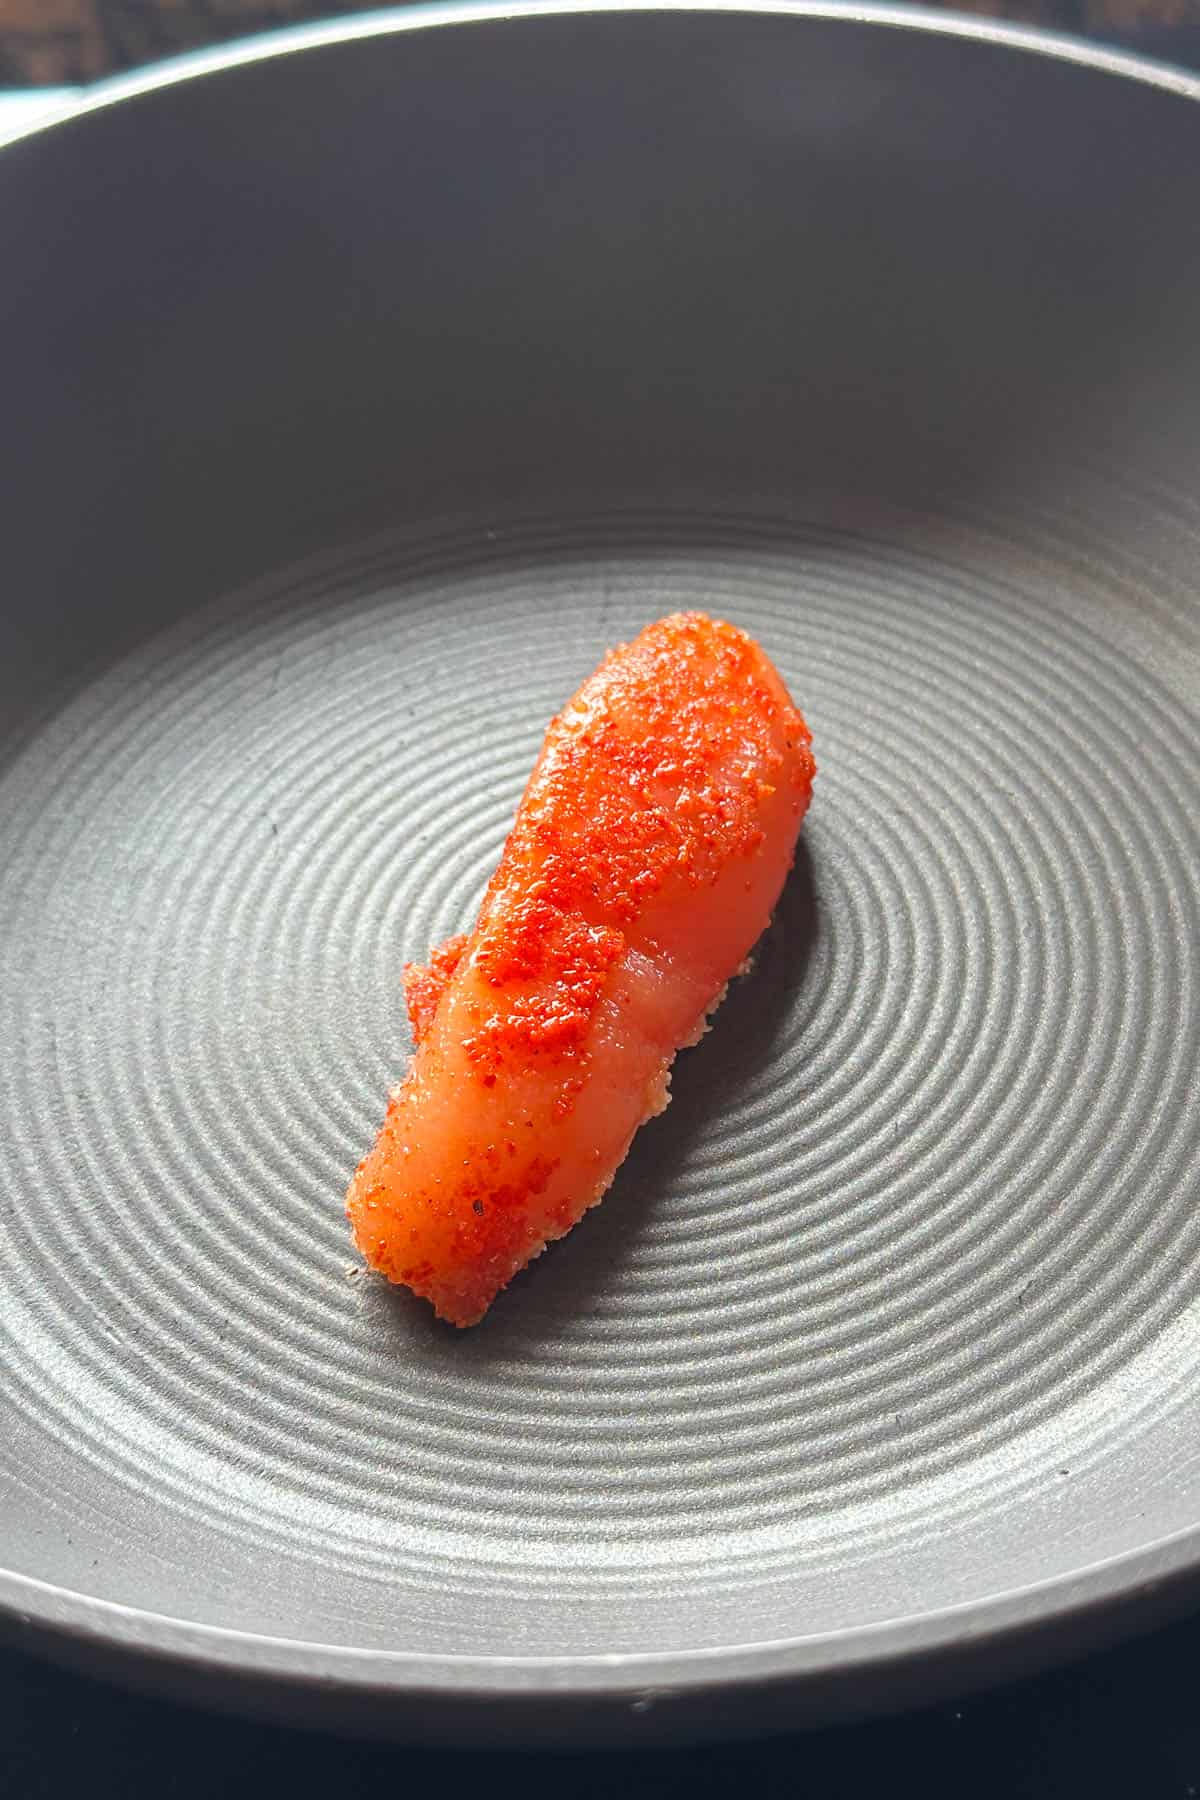
Heat a small pan over medium heat. Place 1 whole mentaiko lobe in the pan. Cook for 1-2 minutes on each side until the mentaiko is cooked.
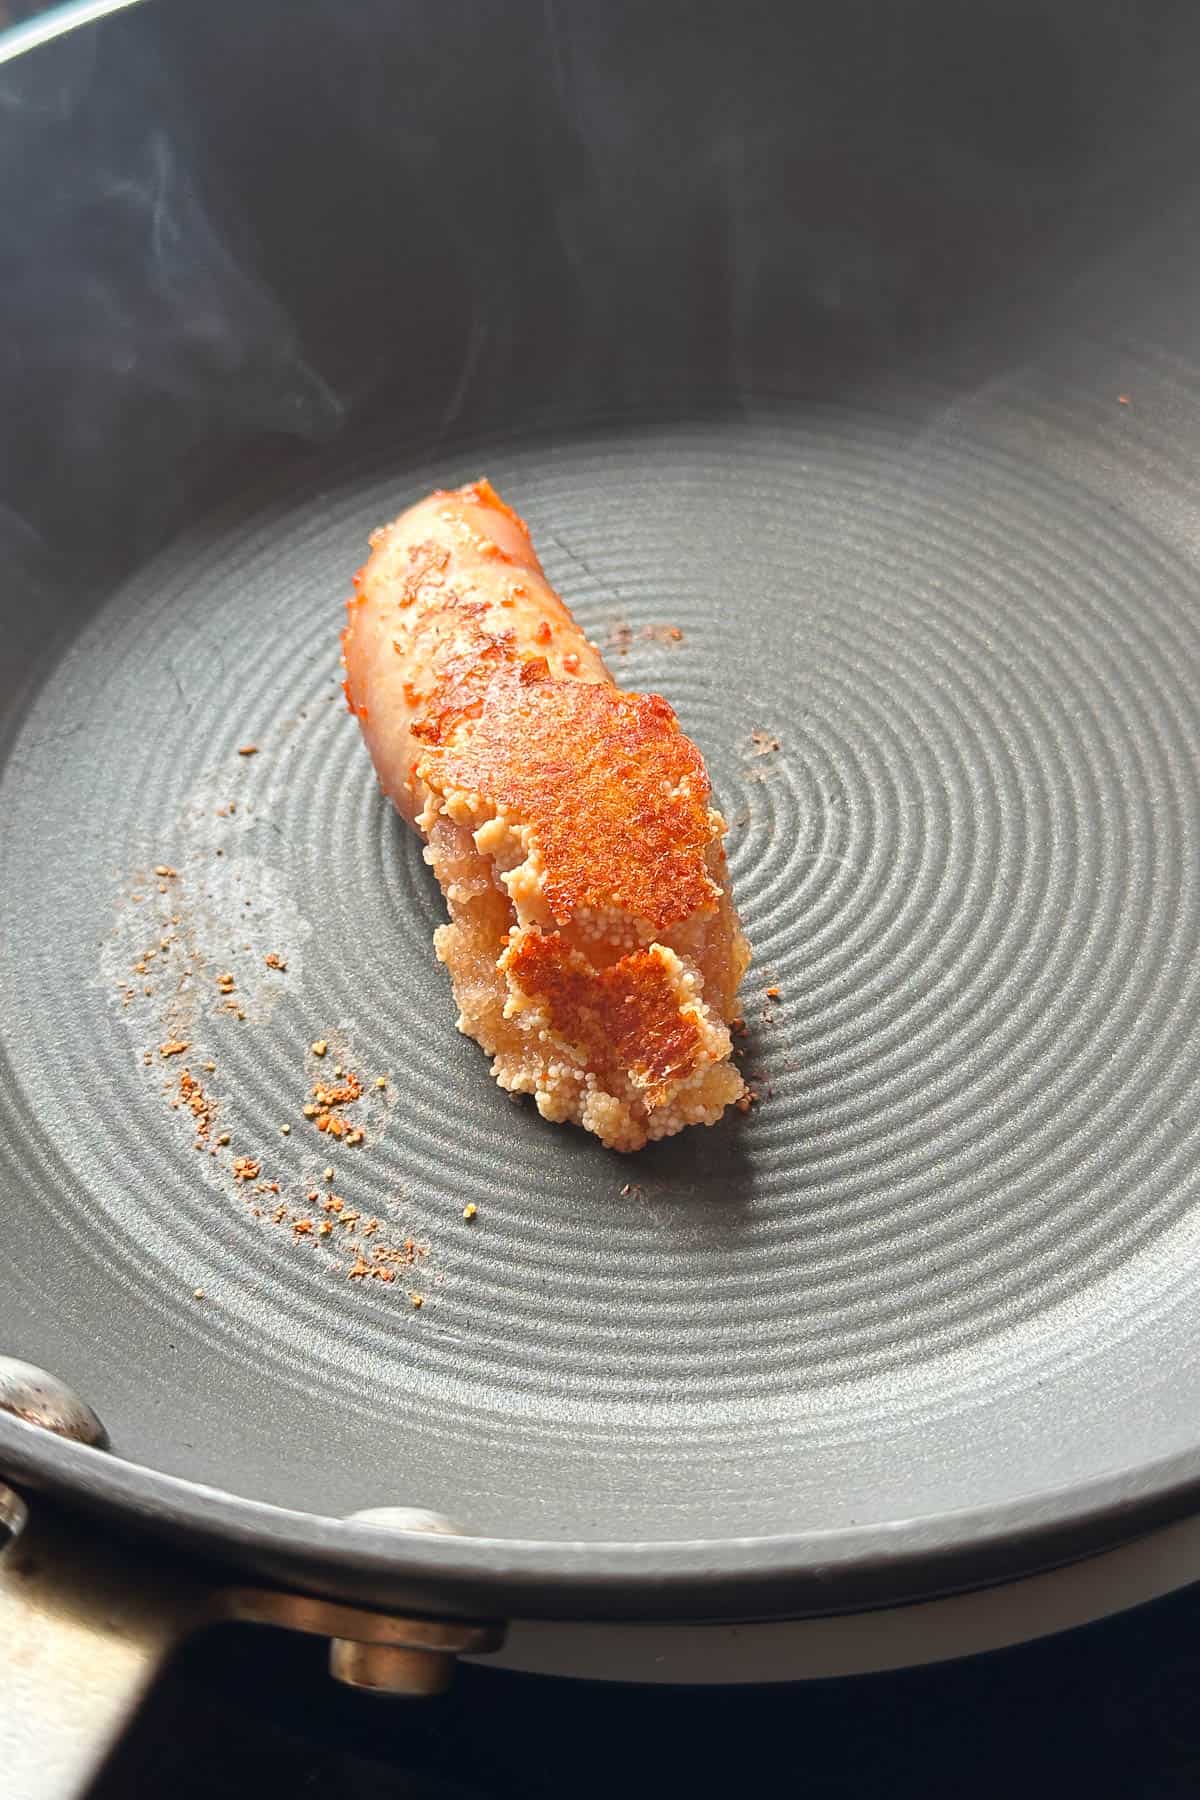
Once cooked, the color of the mentaiko lobe will turn opaque, a pale pink color and feel more "solid." If this is the only style of filling you want to make, feel free to cook all 3 mentaiko lobes at the same time.
If making Mentaiko Mayo Filling:
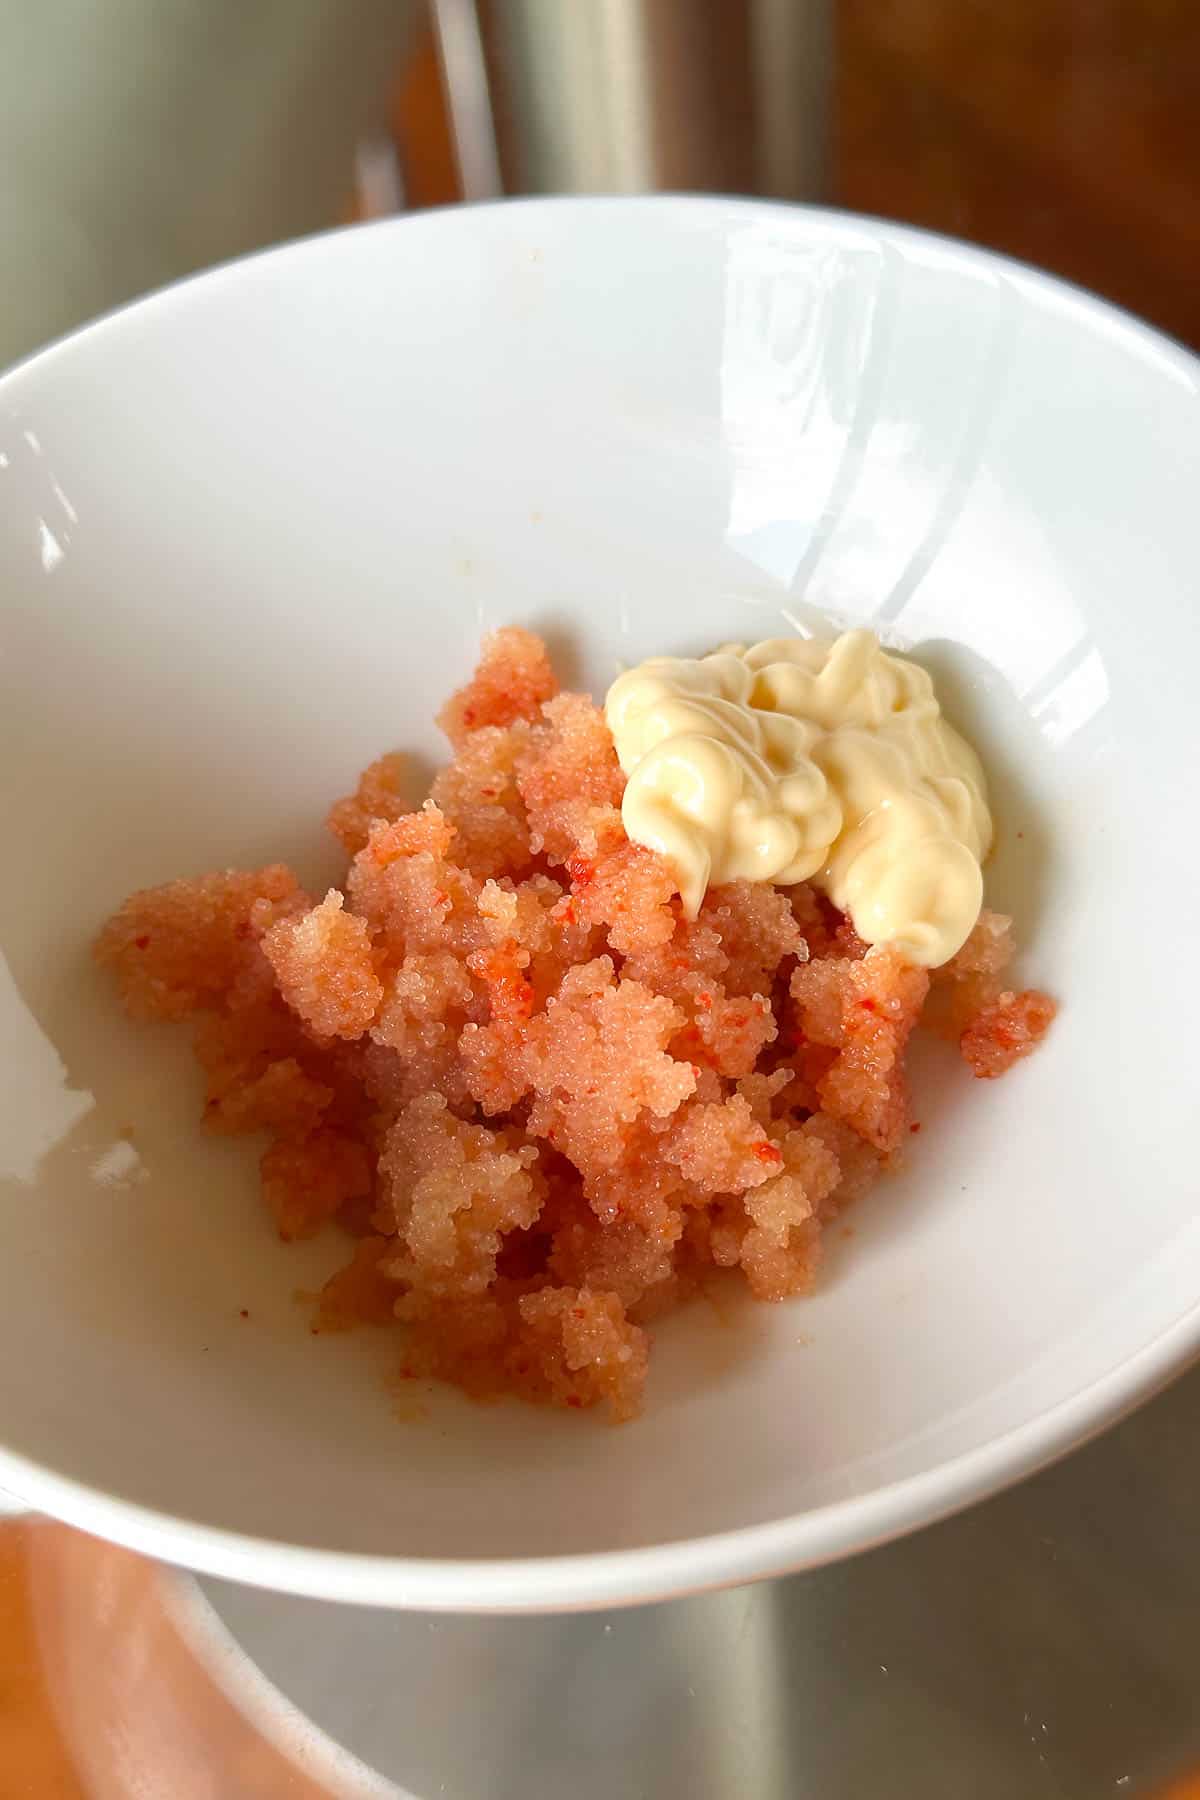
Remove the mentaiko from the thin sac/membrane. There are many ways to do this. I use my fingers to hold one end of the mentaiko and then use chopsticks to press and squeeze all the roe out into a small bowl. (You can also use a small knife to cut a slit into the sac/membrane and then scrape out all the roe.)
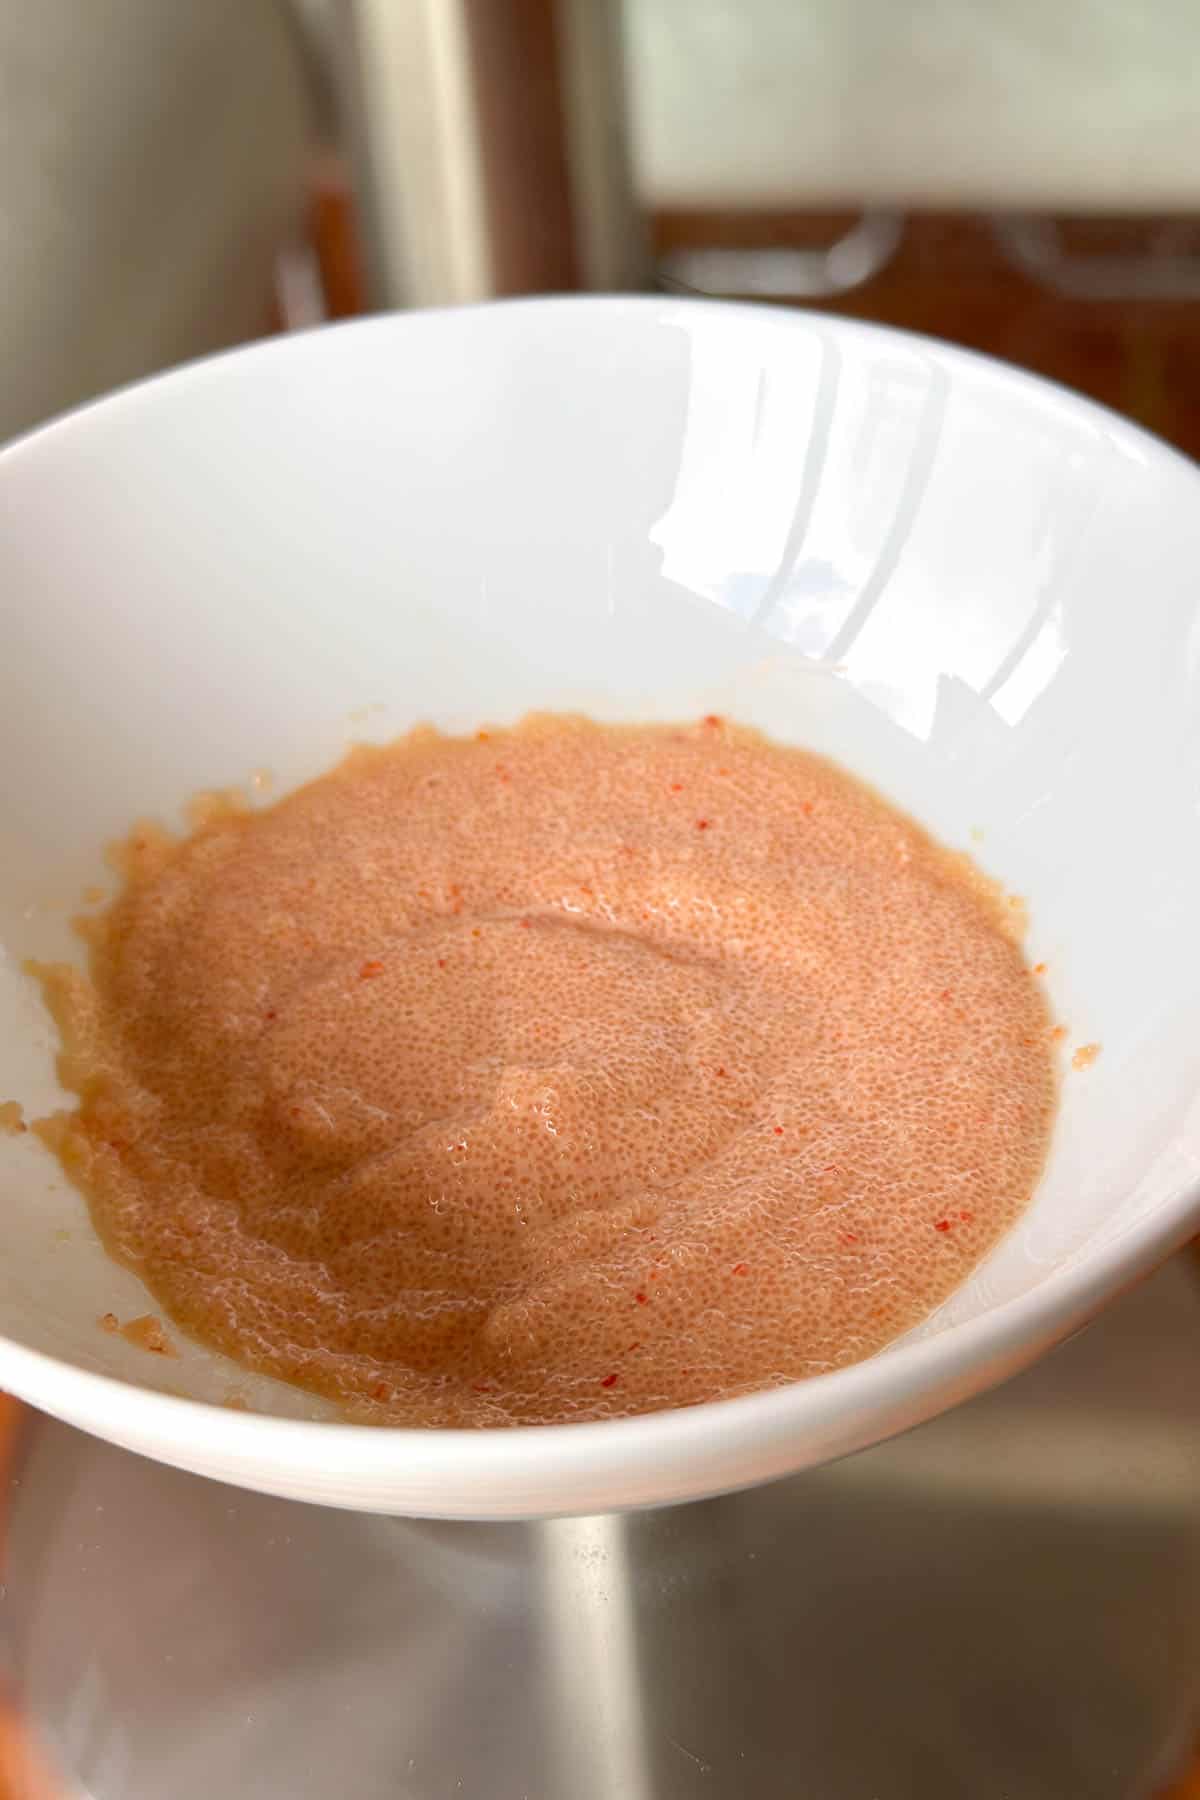
Add 1 tablespoon of Kewpie mayonnaise to the bowl (1 tablespoon per mentaiko lobe). Mix well.
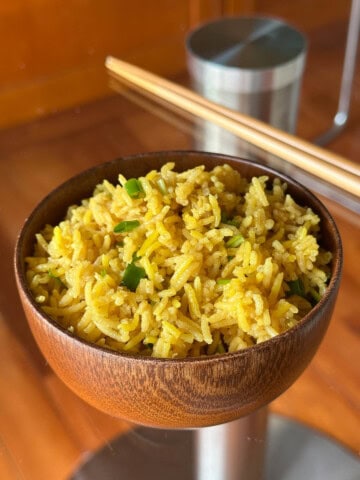
If making Sesame Oil Mentaiko Filling:
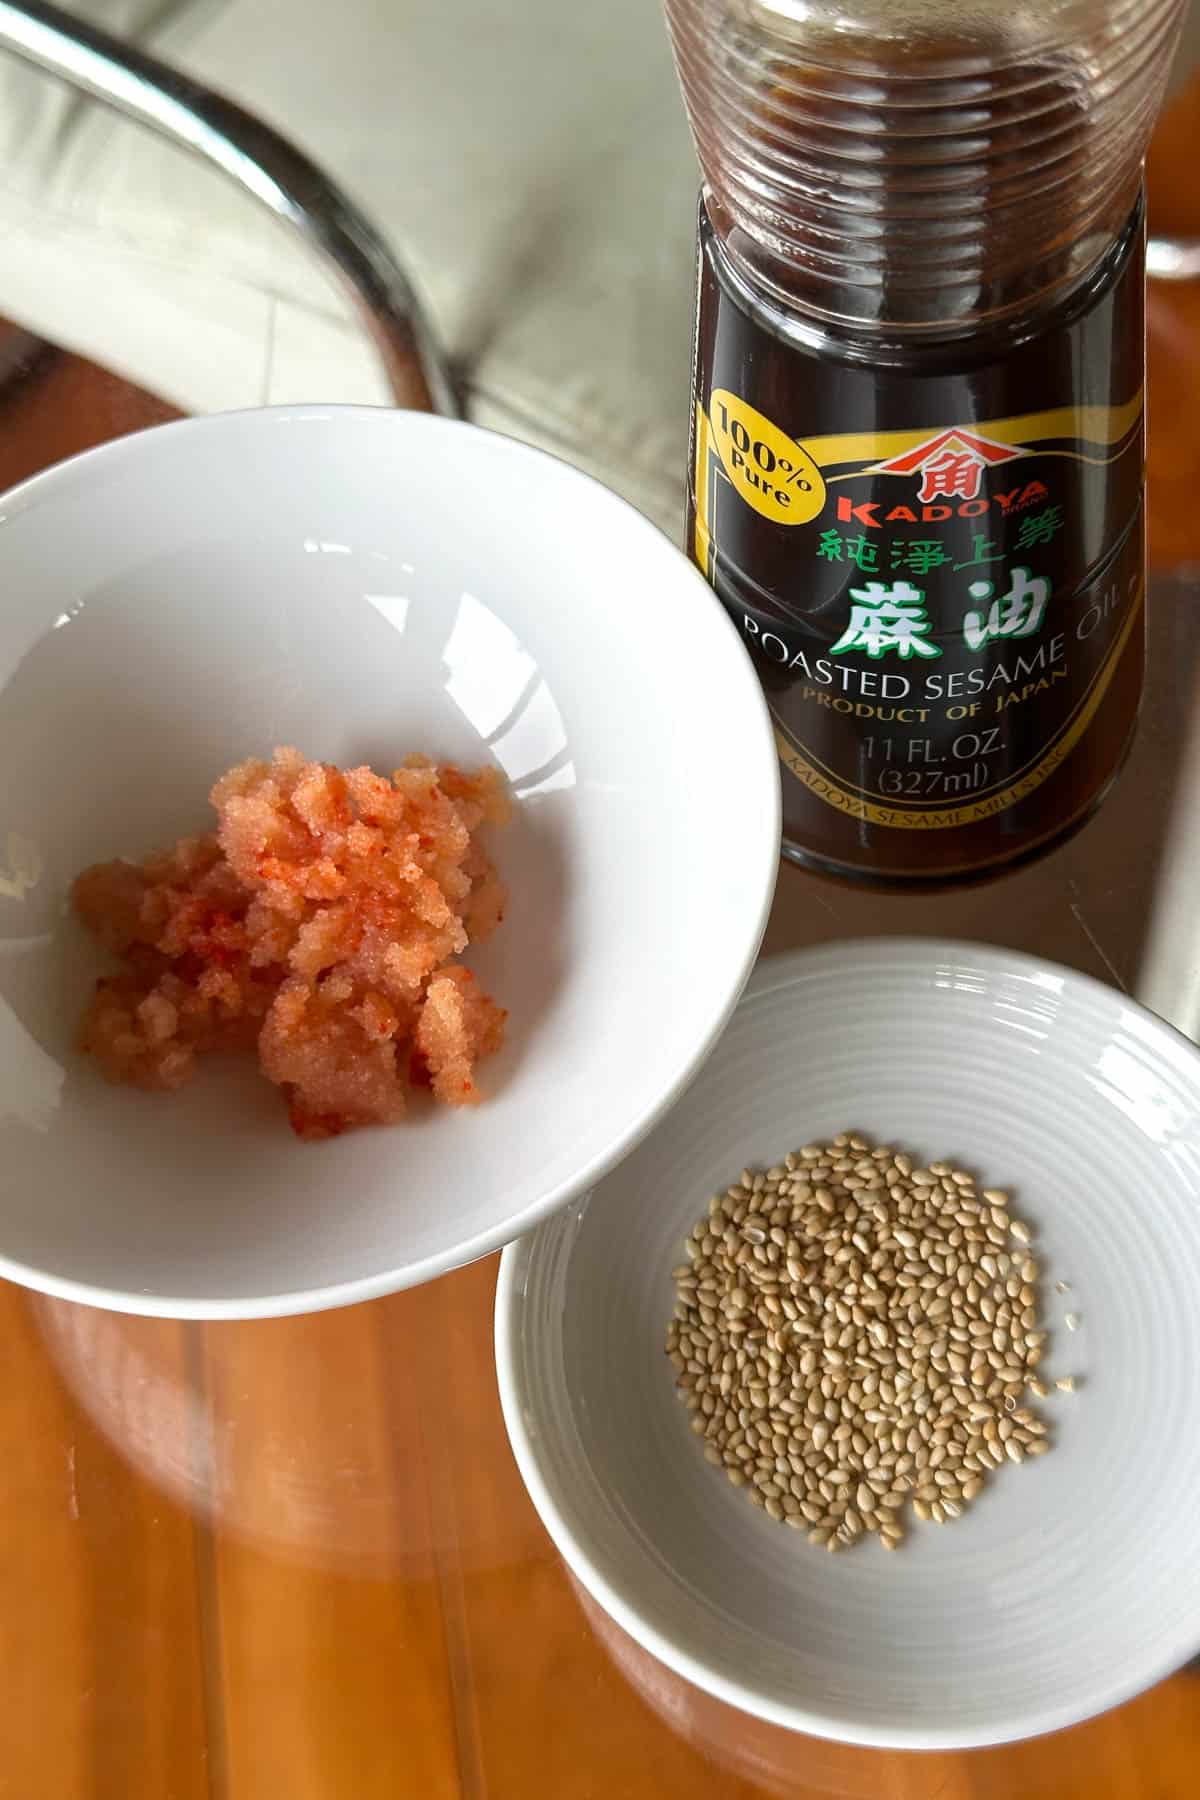
Remove the mentaiko from the thin sac/membrane (see above paragraph for more details). Place the mentaiko in a small bowl.
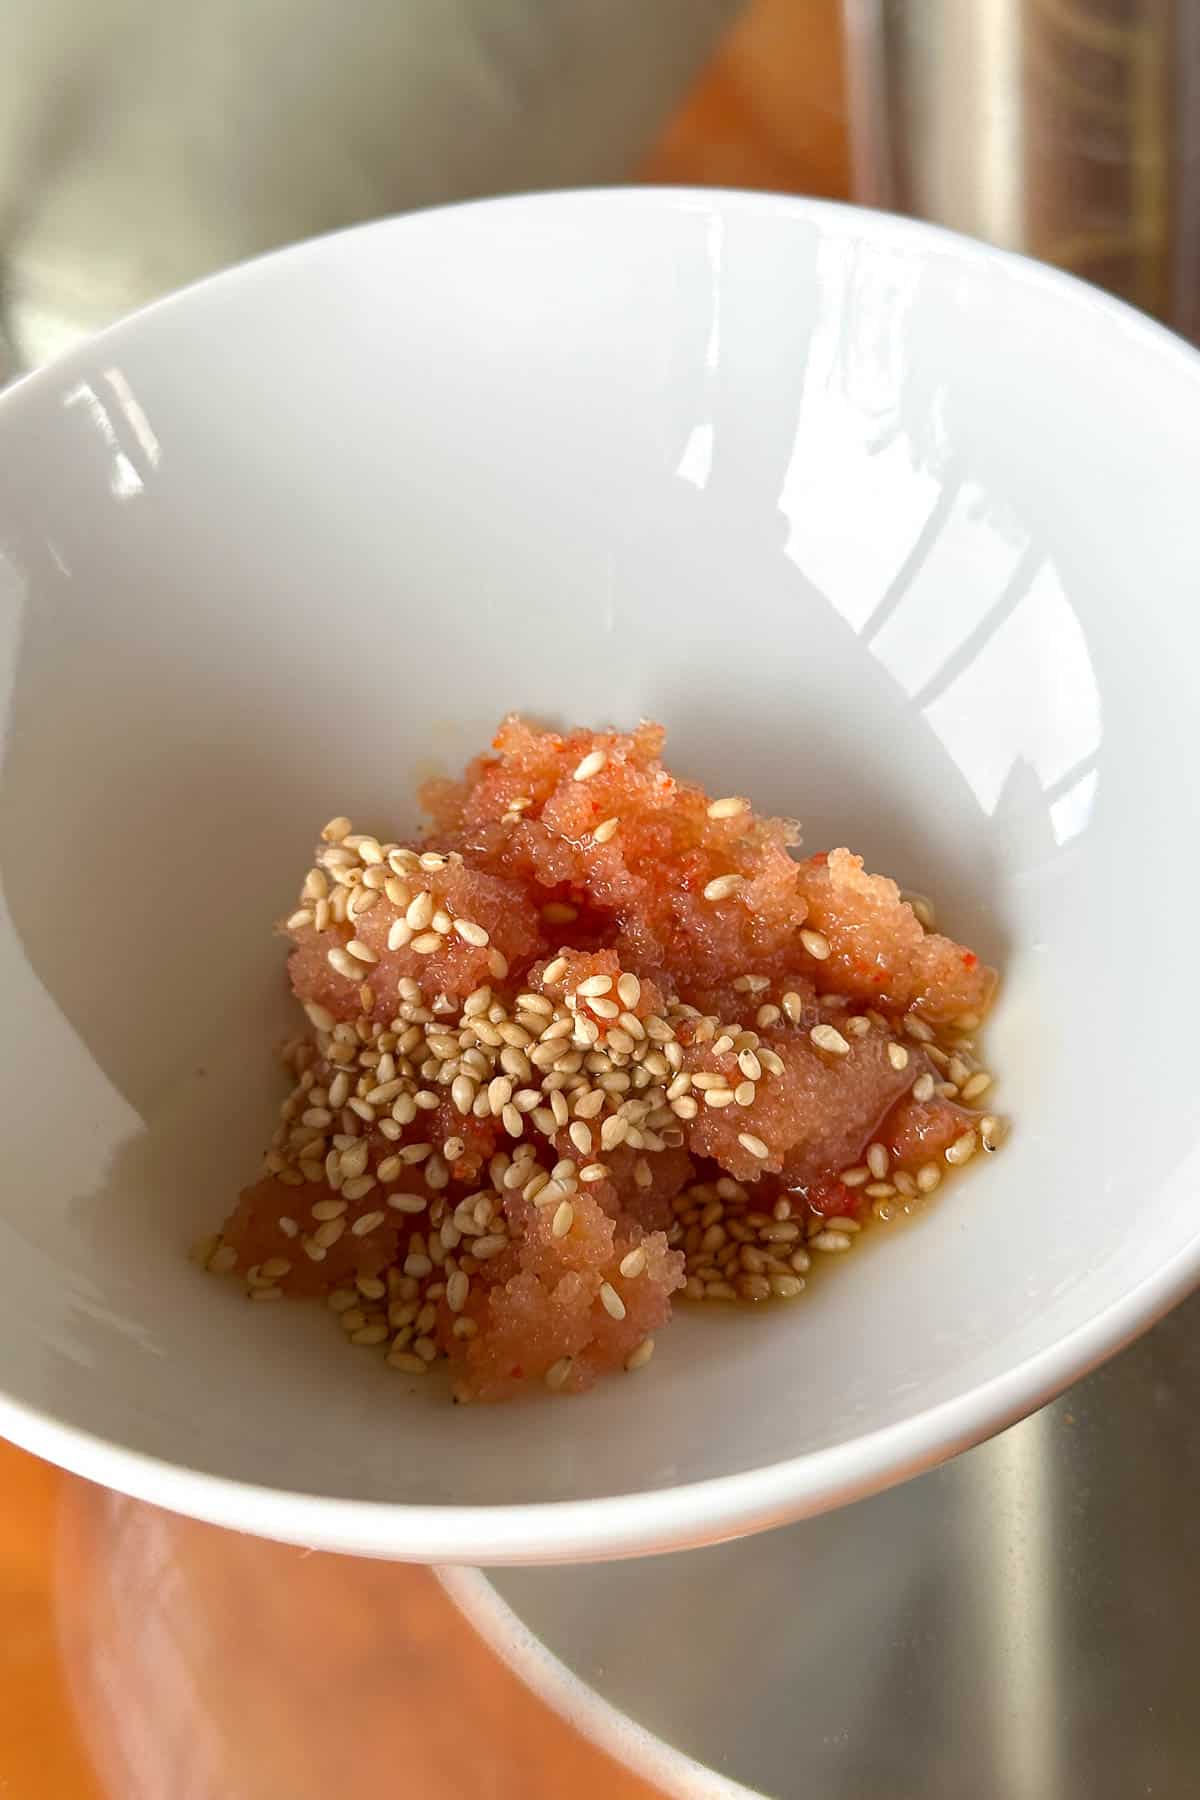
For each mentaiko lobe, add 1 teaspoon sesame oil and 1 teaspoon sesame seeds. Mix well.
Prepare the rice.
If the rice is still in the rice cooker, fluff the rice and then use a rice paddle to move all the rice into a large bowl. Set aside.
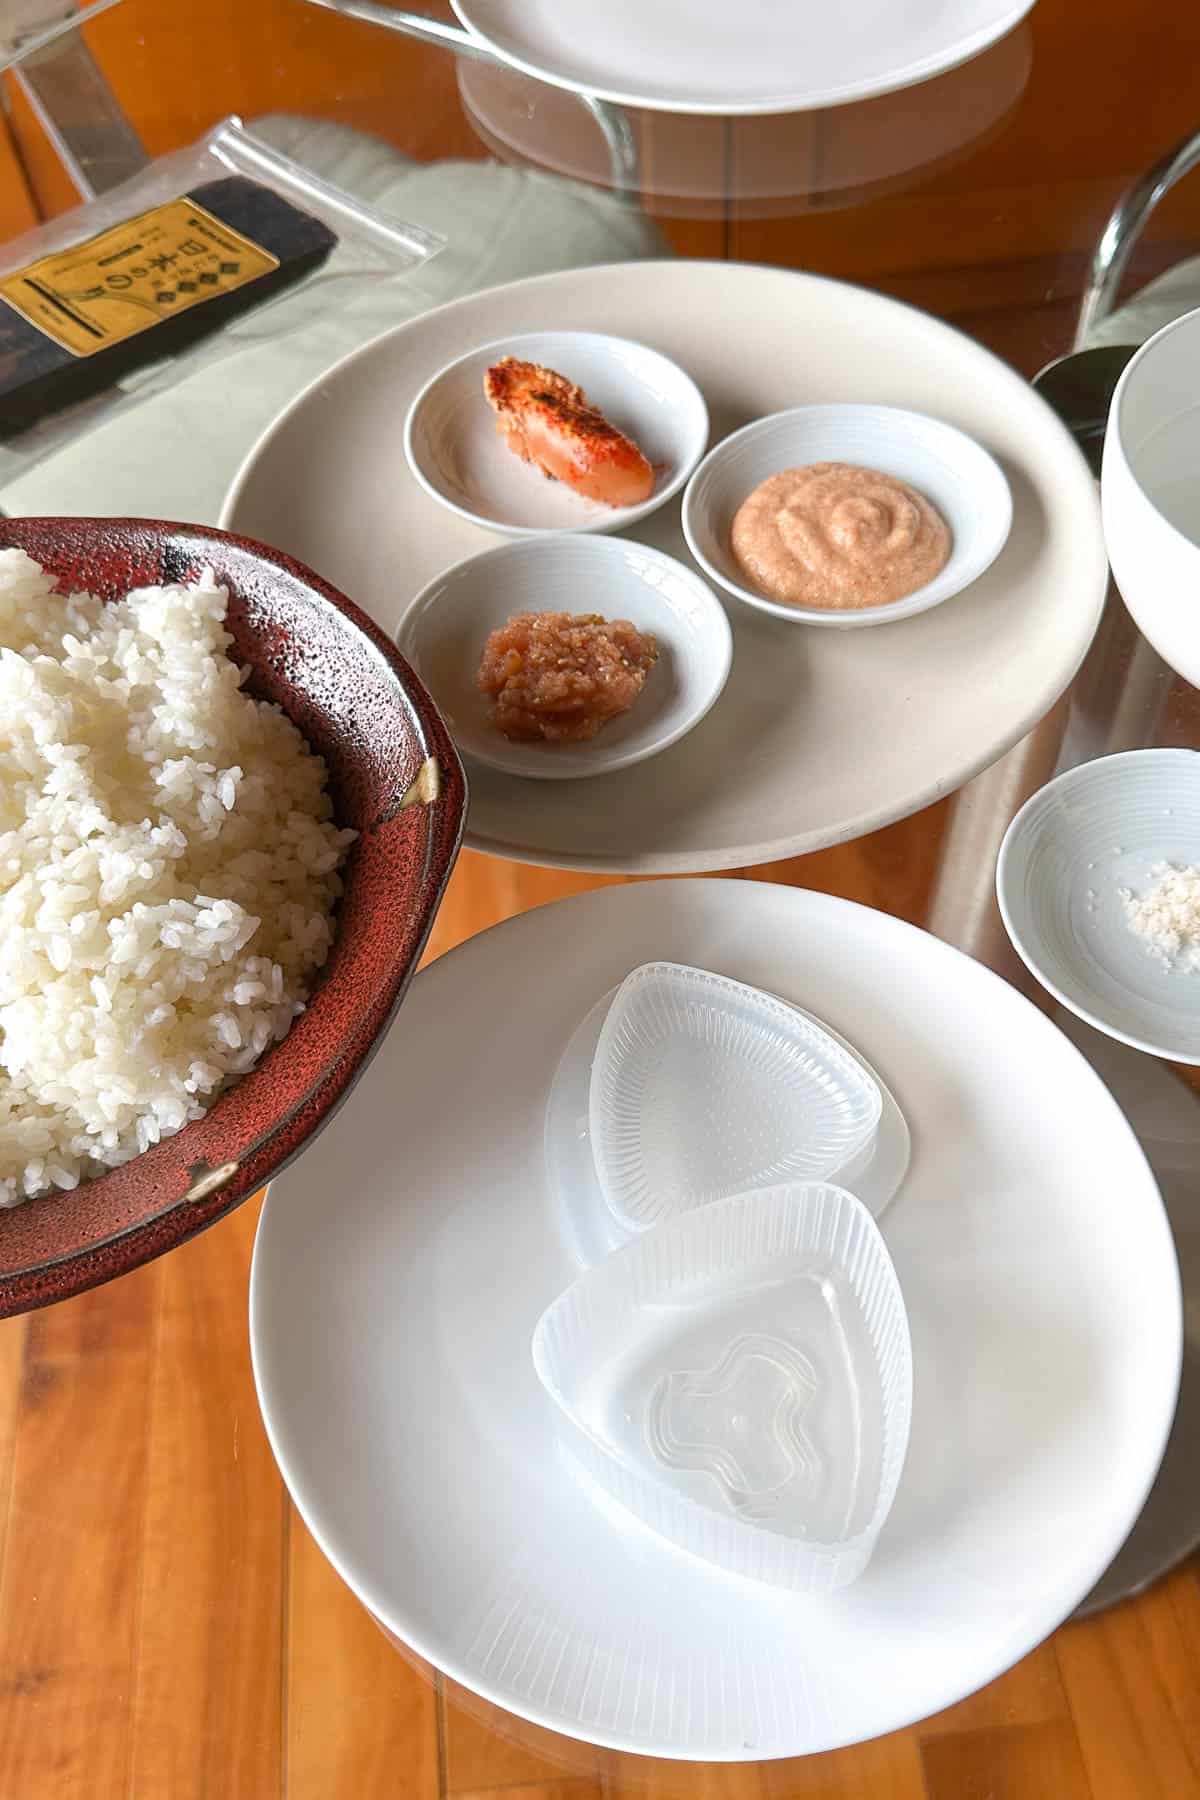
Prepare your onigiri making station.
Use a large plate or cutting board as your onigiri station. Wash the onigiri mold and place it on the plate. Sprinkle some sea salt into a small dish and place that on the side (we will need to salt the onigiri mold later).
Your onigiri making station should have 3 main parts:
- The bowl of still warm rice.
- The bowl(s) with the mentaiko filling (I made all 3 types of mentaiko fillings in the photo above).
- The onigiri mold, plate (or cutting board), and small dish of sea salt. Now let's get assembling!
Prepare the mold.
Lightly wet the onigiri mold with a splash of water (shake out the excess water). Then using some sea salt from the dish, sprinkle a little salt inside the mold.
*You can also put a bowl filled with water on the side and dip the onigiri mold into the water (so that you don't have to keep going back to the sink).
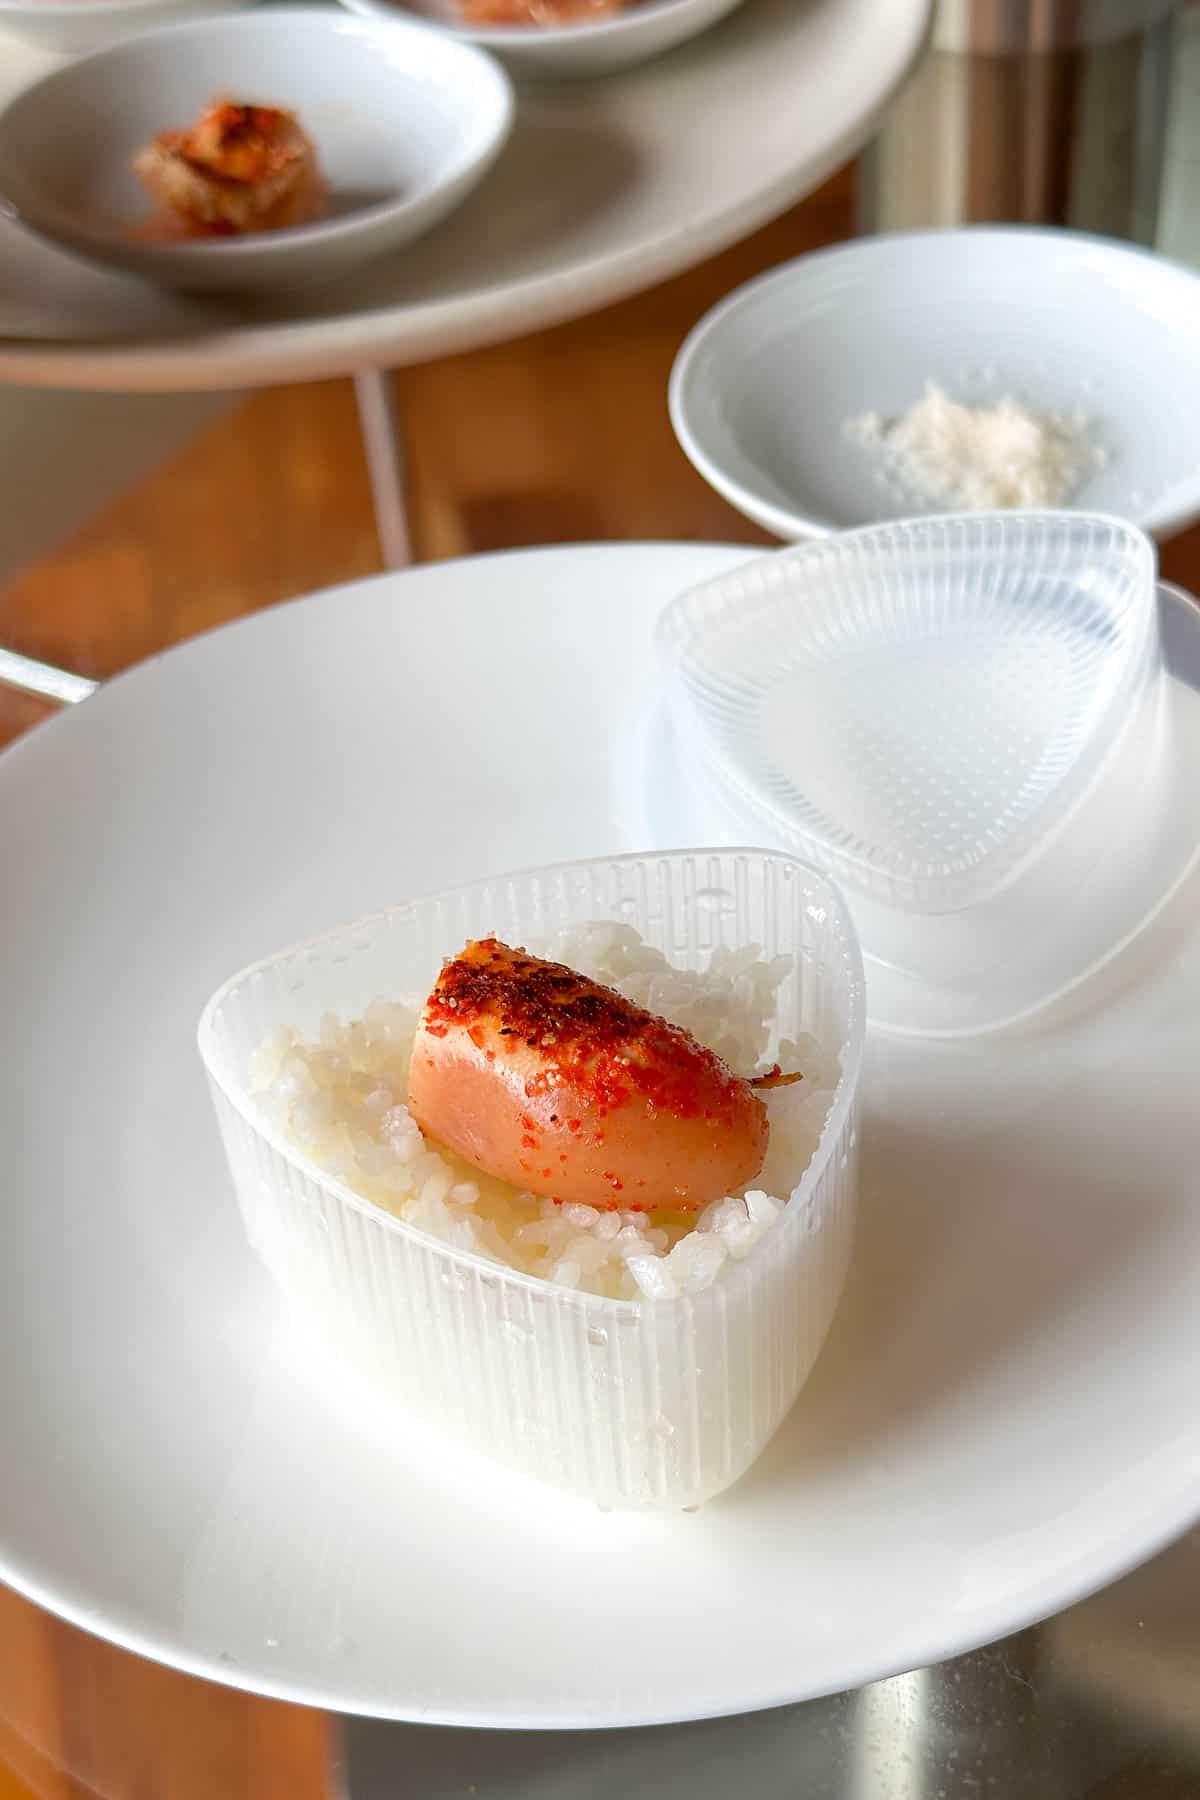
Add the first layer of rice.
Fill the onigiri mold 40% full with the rice. Gently pat the rice in using a rice paddle. Never ever smash the rice.
Add the filling.
Then add a teaspoon of the mentaiko filling on top of the rice. Make sure the filling is positioned in the center of the mold.
Here's what the filling looks like with the plain (cooked) mentaiko filling:
And the filling looks like with the mentaiko mayo filling:
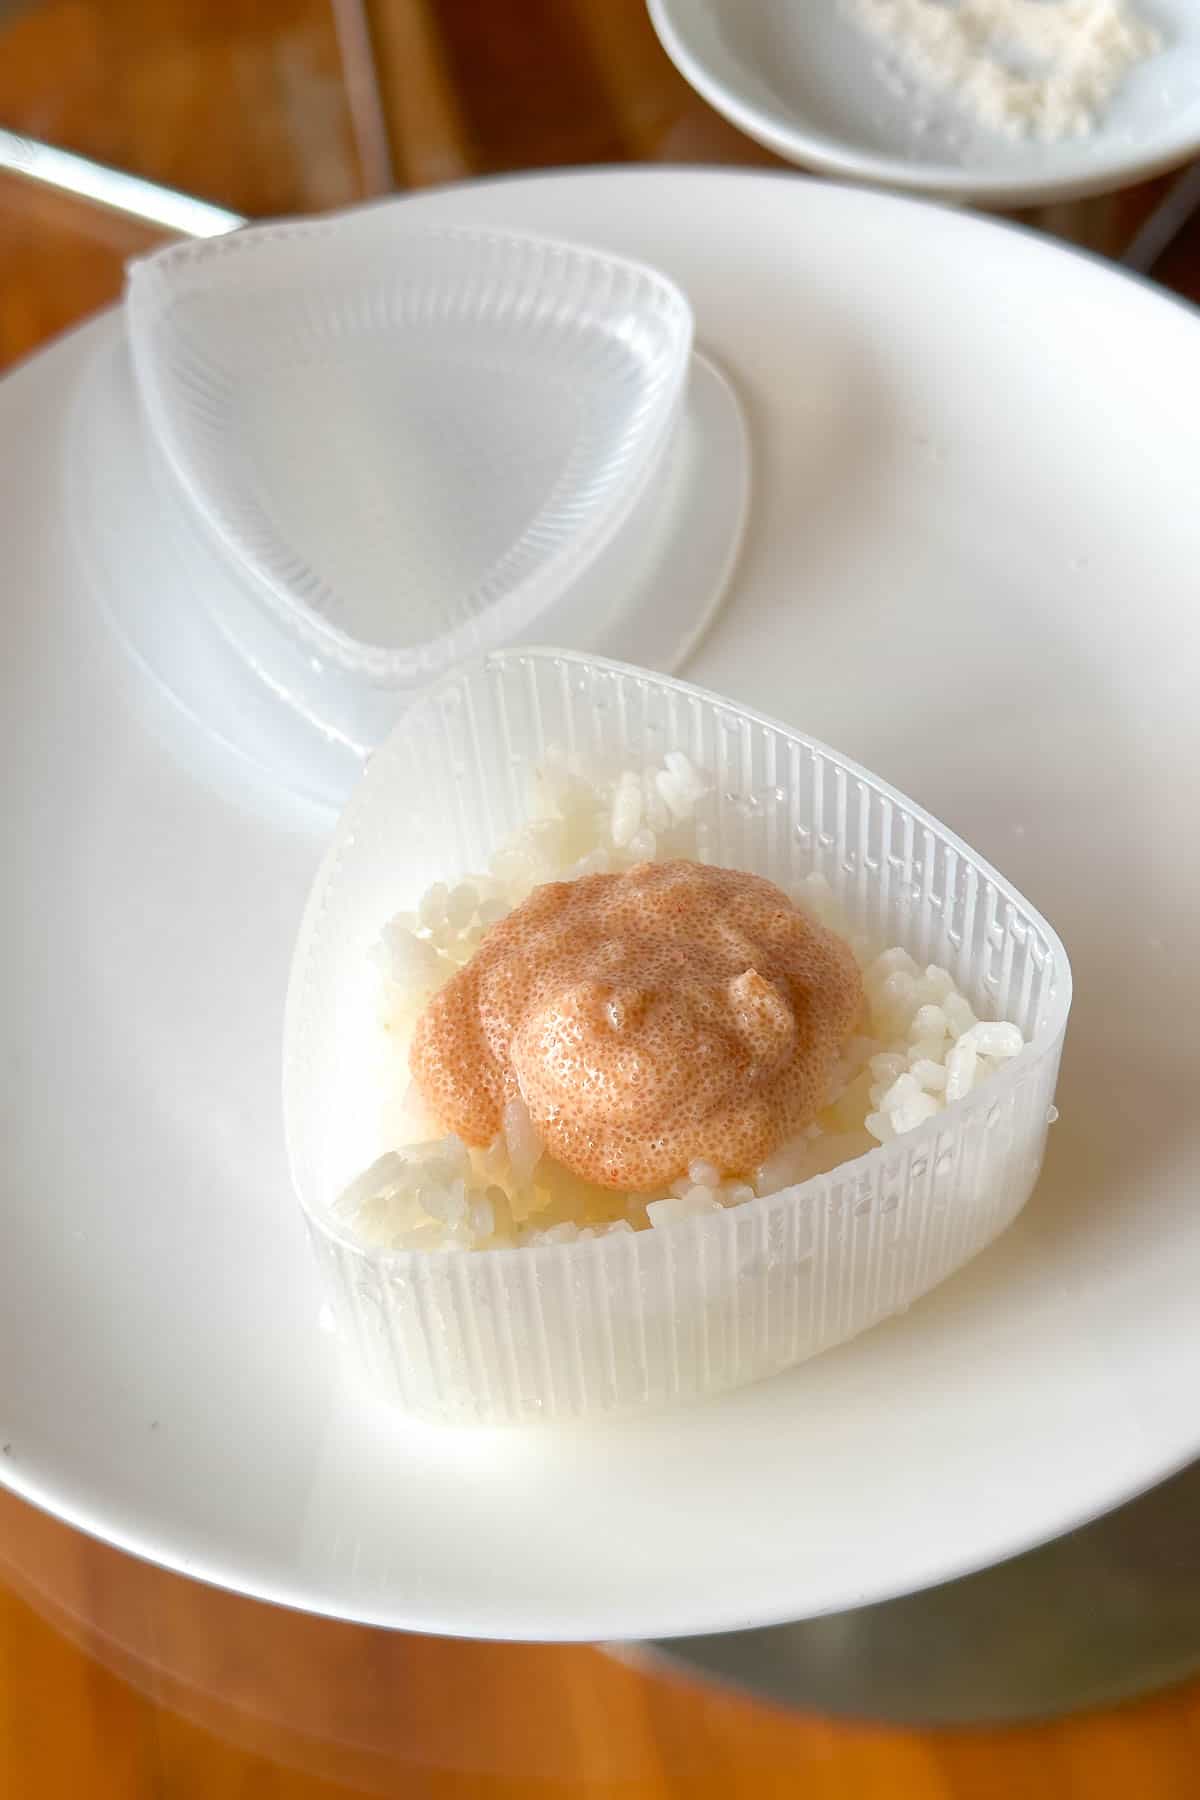
Here's what the filling looks like with the sesame oil mentaiko filling:
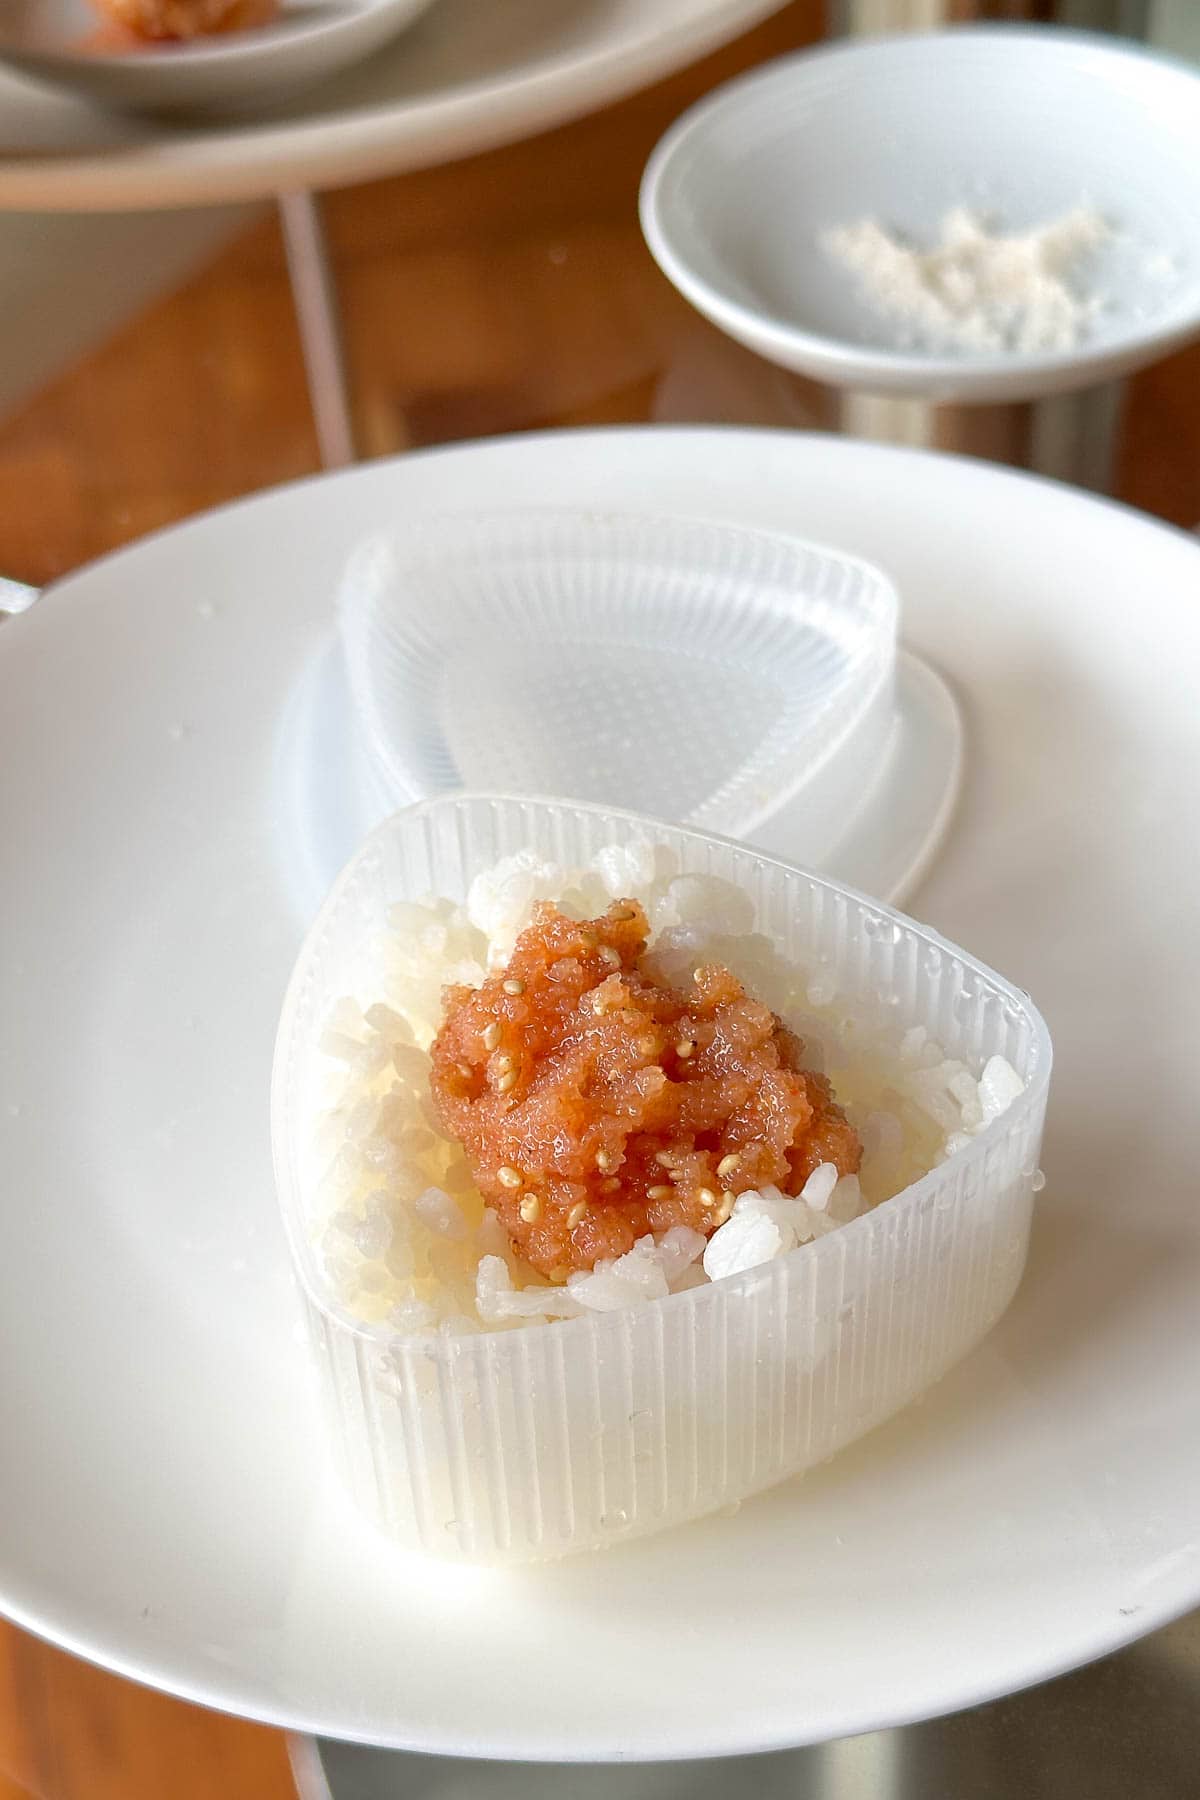
Note: For the mentaiko mayo and seasme oil mentaiko fillings, use 1 teaspoon of filling. For the plain (cooked) mentaiko filling, cut the cooked mentaiko lobe in half and use half a lobe as the filling for each onigiri.
Add the second layer of rice.
Cover the filling with some more rice until you reach the top of the mold.
Press and seal.
Use the top/lid of the mold to gently press and "seal" the onigiri.
Then flip the mold over and lightly press the back of the mold to "pop" the onigiri out of the mold. Place the onigiri on another plate.
*For more detailed step by step photos of the onigiri making/shaping process, please refer to the Tuna Mayo Onigiri post.
Repeat.
Repeat steps 5-11 until you use all the rice. You should have about 6 onigiri pieces.
Wrap and eat!
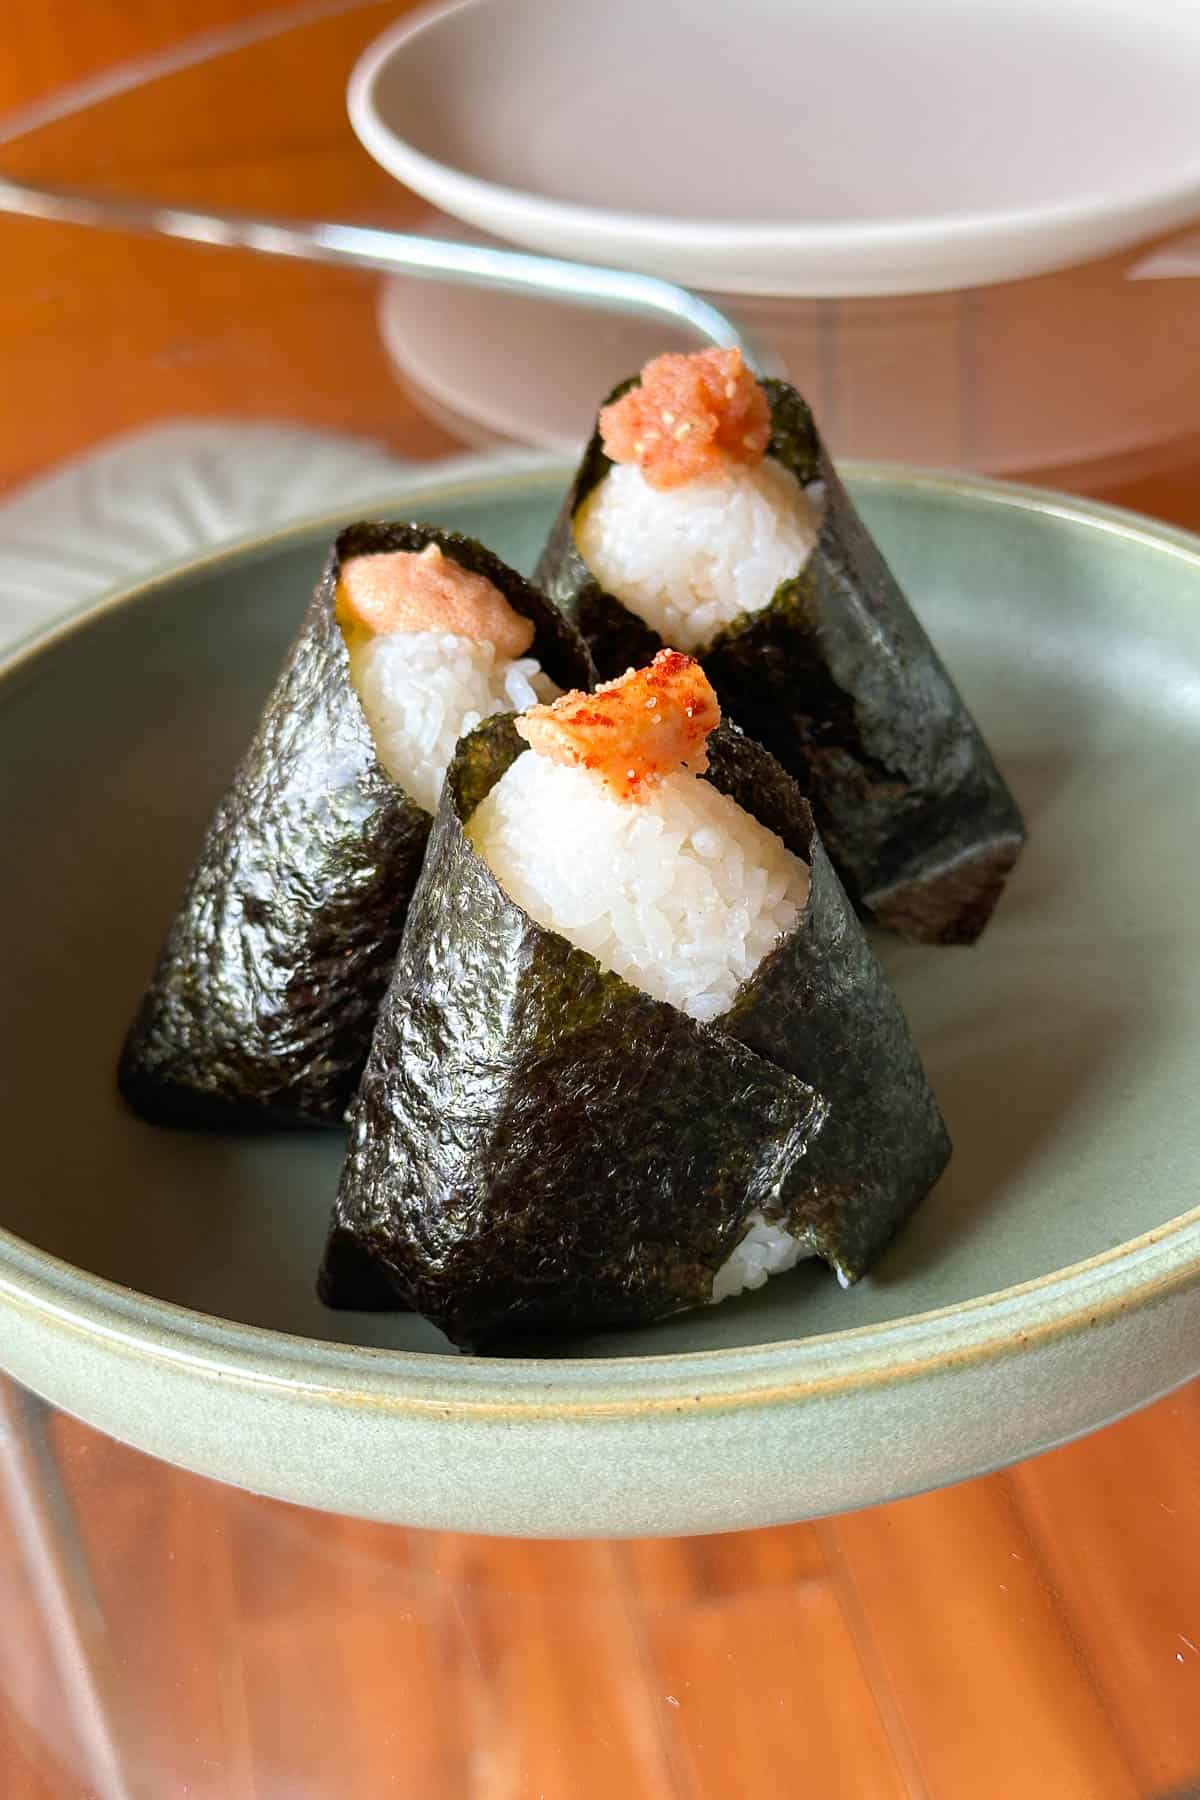
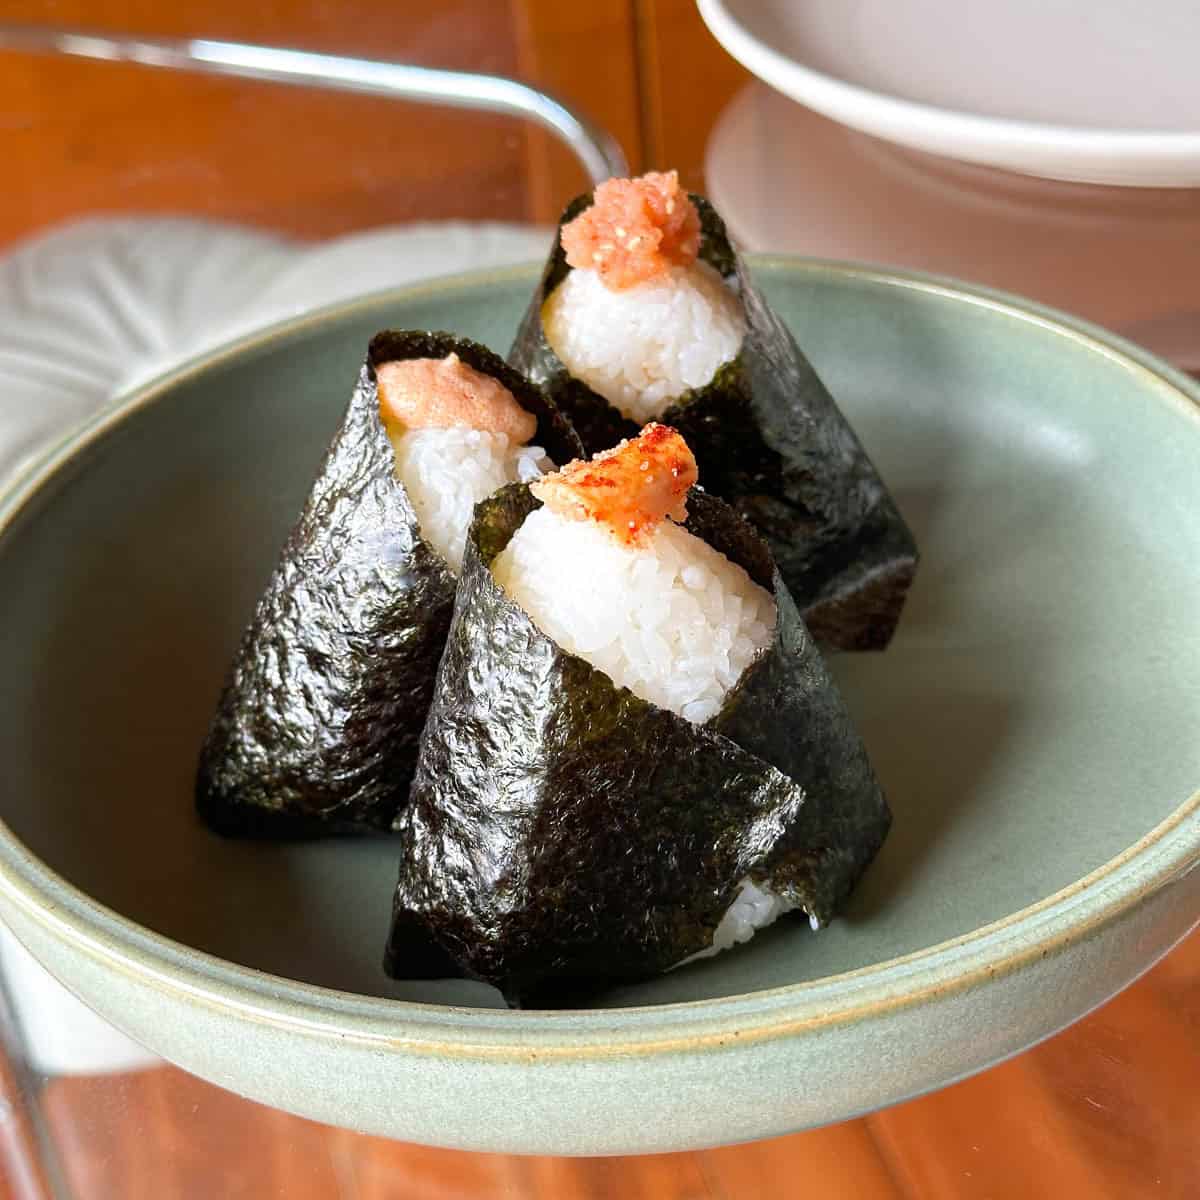
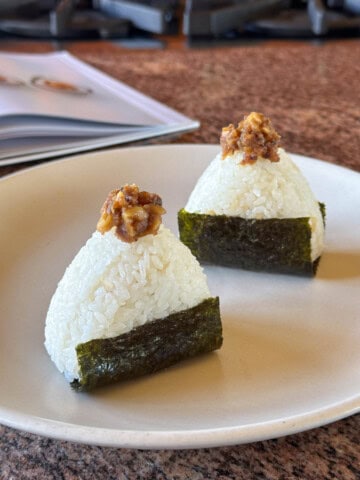
Now it is time to wrap the onigiri! Place a strip of nori on a clean plate. Place the onigiri in the center of the nori.
Then stand the onigiri (with the nori attached) upright. And wrap both side of the nori strip around the onigiri to form a sort of "jacket." Fold the excess nori underneath. Repeat. Eat warm and enjoy ^_^
FAQ and Tips
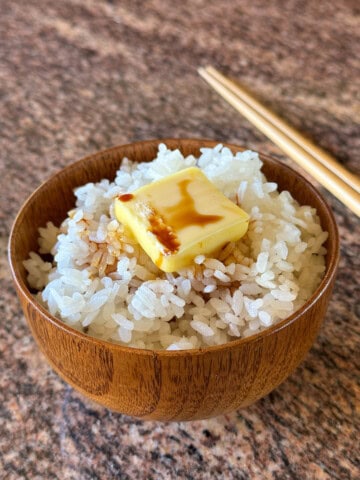
Make mentaiko toast! Make mentaiko pasta or mentaiko udon. Or even mentaiko hapen. Definitely make mentaiko rice.
- The ever popular Tuna Mayo Musubi
- Kombu Musubi, a quiet classic.
- Bacon and rice is a super combo: Bacon Almond Musubi
- And of course, Hawaii's famous Spam Musubi ^_^
When mentaiko is on sale at our local Japanese I buy several packs (they usually come in packs of 3 lobes) and freeze them. They freeze well and defrost fast, so I always have ingredients ready for a tasty meal.
Mentaiko Onigiri / Musubi Recipe
Mentaiko Onigiri / Musubi
Equipment
Ingredients
- 6 cups freshly cooked Japanese short grain rice, still warm 2 cups uncooked rice = 6 cups cooked rice.
- 3 lobes mentaiko (spicy cod roe)
- 2 full size nori sheets Use 2 full size sheets and cut them lengthwise into thirds (to make 6 sheets that are sized for onigiri).
If making plain (cooked) mentaiko filling:
- just a small pan to cook the mentaiko lobes (no additional food ingredients needed)
If making mentiko mayo filling:
- 1 tablespoon mayonnaise Kewpie mayonnaise preferred
If making sesame oil mentaiko filling:
- 1 teaspoon sesame oil
- 1 teaspoon sesame seeds
Instructions
- First make the mentaiko filling. There are 3 types of filling I like to make. All easy and delicious. The first one is the most easy and requires no additional ingredients. The mentaiko mayo one is very popular and the version you'll find at most onigiri/musubi shops. The third version is the one my mom loves. Here's how to make it:Plain (Cooked) Mentaiko Filling: Heat a small pan over medium heat. Place 1 whole mentaiko lobe in the pan. Cook for 1-2 minutes on each side until the mentaiko is cooked (the color of the lobe will turn opaque, a pale pink color). If this is the only style of filling you want to make, feel free to cook all 3 mentaiko lobes at the same time.Mentaiko Mayo Filling: Remove the mentaiko from the thin sac/membrane. There are many ways to do this. I like to use my fingers to hold one end of the mentaiko and then use chopsticks to press and squeeze all the roe out into a small bowl. (You can also use a small knife to cut a slit into the sac/membrane and then scrape out all the roe.) Add 1 tablespoon of Kewpie mayonnaise to the bowl (1 tablespoon per mentaiko lobe). Mix well.Sesame Oil Mentaiko Filling: Remove the mentaiko from the thin sac/membrane (see above paragraph for more details). Place the mentaiko in a small bowl. For each mentaiko lobe, add 1 teaspoon sesame oil and 1 teaspoon sesame seeds. Mix well.
- Now prepare the rice:If the rice is still in the rice cooker, fluff the rice and then use a rice paddle to move all the rice into a large bowl. Set aside.
- Then prepare your onigiri making station:Use a large plate or cutting board as your onigiri station. Wash the onigiri mold and place it on the plate. Sprinkle some sea salt into a small dish and place that on the side (we will need to salt the onigiri mold later).
- Now your onigiri making station should have 3 main "components":- the bowl of still warm rice.- the bowl with the mentaiko filling.- the onigiri mold, plate (or cutting board), and small dish of sea salt.Now let's get assembling!
- Lightly wet the onigiri mold with a splash of water (shake out the excess water). Then using some sea salt from the dish, sprinkle a little salt inside the mold.*You can also put a bowl filled with water on the side and dip the onigiri mold into the water (so that you don't have to keep going back to the sink).
- Fill the onigiri mold 40% full with the rice. Gently pat the rice in using a rice paddle. Never ever smash the rices
- Then add a teaspoon of the mentaiko filling on top of the rice. Make sure the filling is positioned in the center of the mold.Note: For the mentaiko mayo and seasme oil mentaiko fillings, use 1 teaspoon of filling. For the plain (cooked) mentaiko filling, cut the cooked mentaiko lobe in half and use half a lobe as the filling for each onigiri.
- Cover the filling with some more rice until you reach the top of the mold.
- Use the top/lid of the mold to gently press and "seal" the onigiri.
- Then flip the mold over and lighlty press the back of the mold to "pop" the onigiri out of the mold. Place the onigiri on another plate.
- Repeat steps 5-11 until you use all the rice. You should have about 6 onigiri pieces.
- Now it is time to wrap the onigiri! Place a strip of nori on a clean plate. Place the onigiri in the center of the nori.
- Then stand the onigiri (with the nori attached) upright. And wrap both side of the nori strip around the onigiri to form a sort of "jacket." Fold the excess nori underneath. Repeat. Eat warm and enjoy!

Mahalo for Reading!